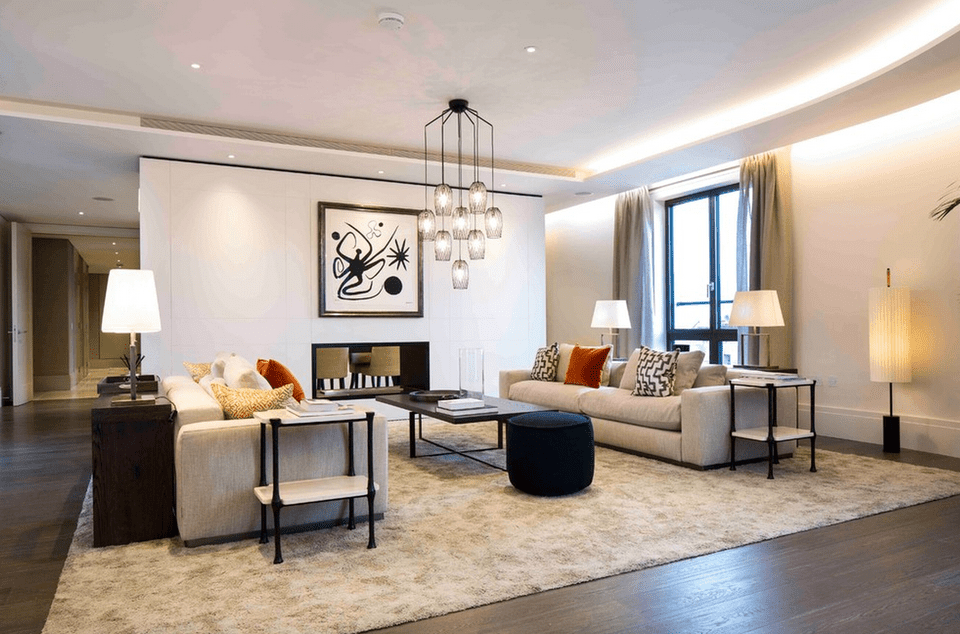
This week I have a review of one of my most popular post/episodes. It’s a mini lesson packed full of information. It covers lighting design basics and lighting terminology. This is a good review for next week when I’ll have a brand new episode that will discuss lighting specifically for rooms with tall ceilings, that is ceilings that are 9 feet or higher. Basic lighting design principles need to be tweaked a bit for rooms with high ceilings, and we’ll talk about that next week. But have a listen/look to Lighting 101 now, so you’ll be ready for next week. And quiz yourself, if you’ve listened before. I love lighting fixtures. I’d have a beautiful chandelier in almost every room of the house, if I could. But there’s more to lighting than pretty fixtures. Lighting is first and foremost functional. I briefly covered lighting in episode 25 called "8 Kitchen Design Mistakes to Avoid". Mistake #6 was “Going Light on Lighting.” That’s not what we want to do in the kitchen, or any other place in the house. In this week’s mini lesson, we’ll go over some basic rules to follow when choosing lighting for your new home. Now, an electrician or lighting designer will be invaluable in making specific suggestions your project, but today we’ll cover some general guidelines. As with most guidelines, experts sometimes disagree. I noticed when doing my research that one website might have slightly different guidelines and advice than another. So the tips and rules that I’ll outline today may be just a little different from what you read or hear elsewhere, but this information should help you give you some basic, practical tips that will get you on the right path to a well-lit home. We’ll go over the different categories of lighting, where to put warm white light as opposed to cool white light and we’ll get into what size recessed lights are best and how you should space them. Before moving on to our mini lesson, let’s go over a few Pro Terms: Ambient lighting, Task lighting, Accent lighting and Decorative lighting. These are the 4 major categories of lighting. PRO TERMS 1. Ambient Lighting Ambient lighting, also known as general lighting, provides a uniform amount of light throughout a space. It allows you to clearly see what’s in the room so you can navigate the space safely. Recessed lights, cove lighting, flush ceiling lights, fan lights and chandeliers are all examples for ambient lighting. 2. Task Lighting Task lighting provides light for specific tasks or activities--activities like food prep and cooking, reading, or doing your hair and make-up. Task lighting provides light in areas where ambient lighting is either insufficient or not necessary. Task lighting helps us complete certain tasks more easily and safely, whether we are cutting tomatoes or walking up the stairs. Recessed lights and pendants, which can be used for ambient lighting, can also serve as task lighting. And so can floor lamps in reading nooks, and pathway lights in hallways and stairwells. Placing a lighting strip on the bottom of upper kitchen cabinets (called under cabinet lighting) provides great task lighting in the kitchen. 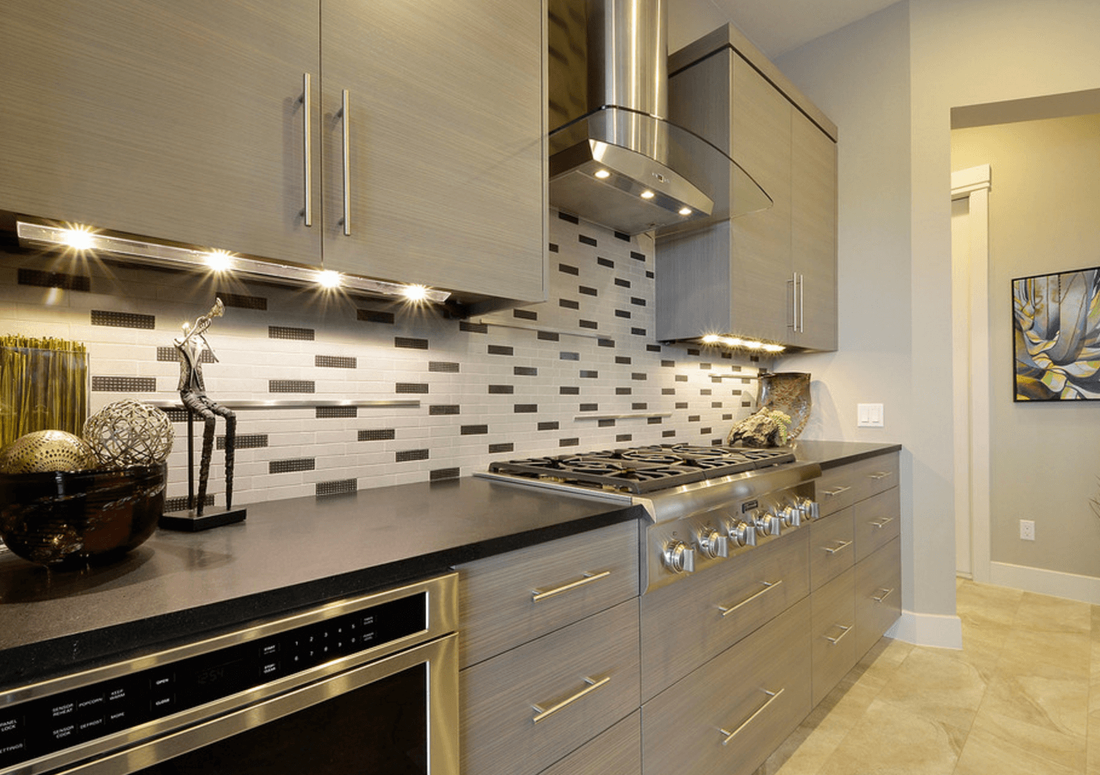
UNDER CABINET TASK LIGHTING
3. Accent Lighting: Accent lighting is directed light that adds drama. It’s used to highlight objects like artwork and architectural features. Accent lighting draws attention towards what you want to stand out. Recessed lighting can work this category of lighting too. Track lights and picture lights are other examples of accent lighting. 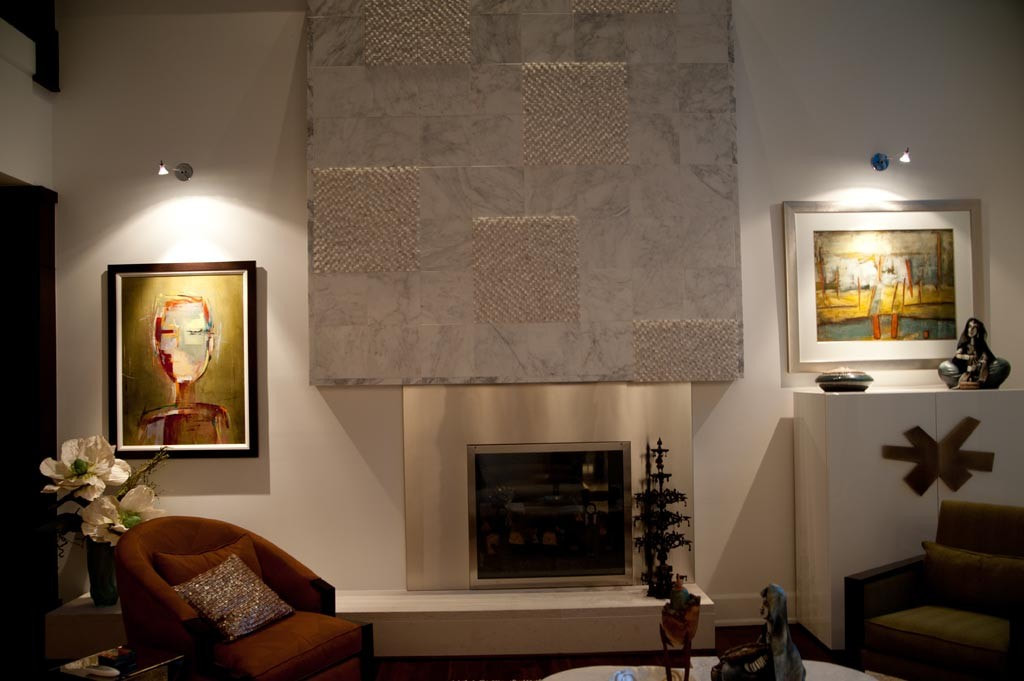
ACCENT LIGHTING OVER PICTURES
4. Decorative Lighting Decorative lighting is like jewelry for the home. If your main reason for choosing a lighting fixture is form, instead of function, then that lighting fixture is decorative. Decorative lighting is added primarily because it’s pretty. But most decorative lighting is also functional, even if function was not on your mind when you chose the fixture. Decorative lighting often falls into one of the other main categories of lighting, so some experts don’t count decorative lighting as a major category. Decorative chandeliers, pendants and scones, for example, can also function as general and task lighting. Whether you think of it as a major category or not, decorative lighting is an important element for most homes. Now that I think about, with the exception of the recessed lights, all of my lighting choices will most likely be decorative. It that wrong? I hope not. Anyway, You should take a layered approach with lighting in most areas of your home. Always combining ambient and task lighting, and adding in accent and decorative lighting as desired. Alright, those are the Pro Terms this week. Before moving on to the mini lesson, shouts out go to Fillup M and angelomuro. Thank you for your very kind, well-written reviews. Thanks for encouraging me and for letting the world know that you find the podcast helpful. I appreciate you for taking the time and effort to do that. Okay, ready for the mini lesson? MINI LESSON Old school incandescent and fluorescent light bulbs are what most of us grew up with. Fluorescent bulbs are those long tube-like bulbs that sometimes make a humming noise. They were often found in in older kitchens. Incandescent bulbs are those pear shaped light bulbs that most people think of when they picture a light bulb. They’re electric bulbs with a wire filament that is heated to such a high temperature that it glows, emitting visible light. 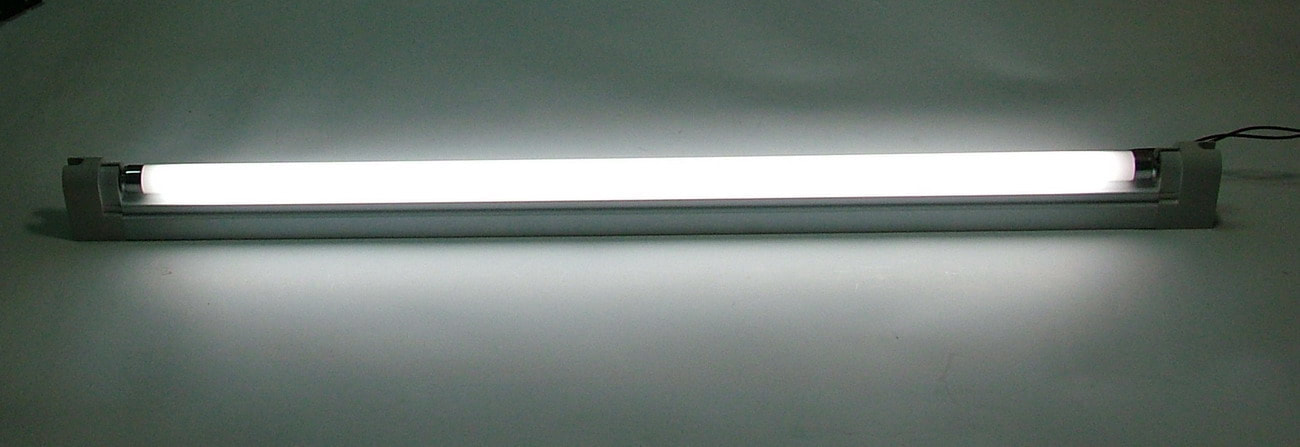
FLUORESCENT
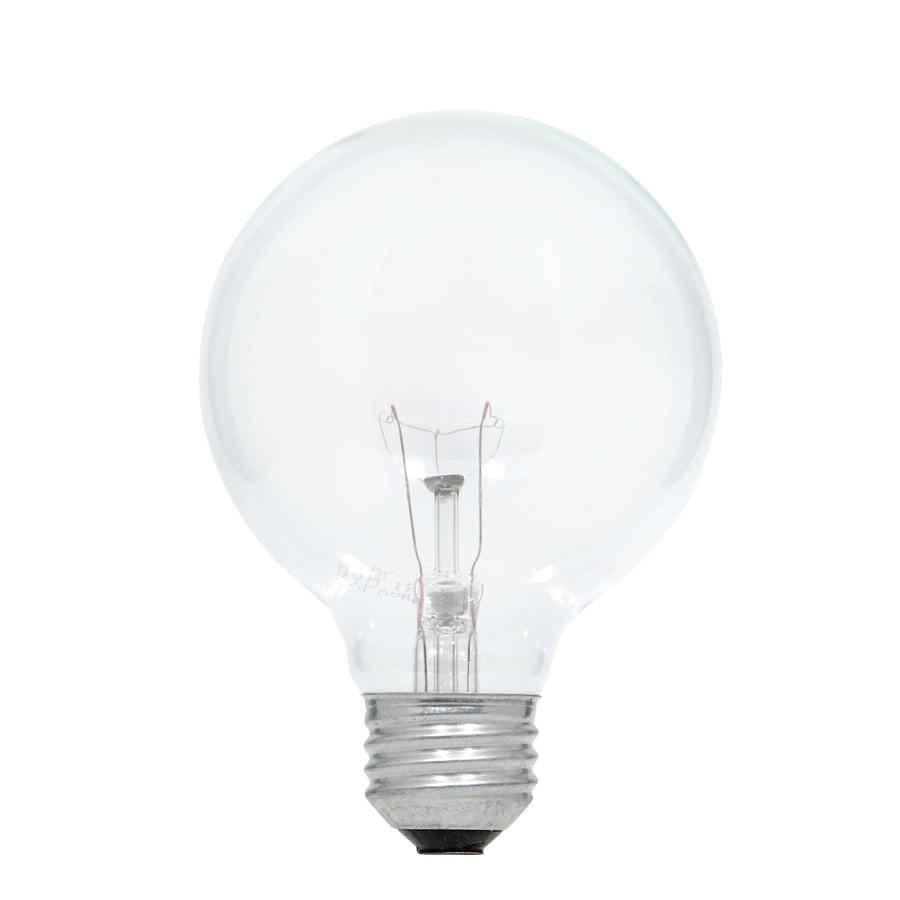
INCANDESCENT
Incandescent bulbs are not being produced like they used to be because a 2009 government regulation discouraged the manufacturing of standard incandescent lights. That’s because they were extremely inefficient, converting only about 5-10% of the energy they produced into light. The remainder of the energy was converted to heat. The result was an extreme waste of electricity. Compared to traditional light bulbs, today’s energy efficient light bulbs such as halogen incandescents, compact fluorescent lamps (CFLs), and light emitting diodes (LEDs) last significantly longer and cost less to operate. In fact, according to energy.gov a traditional 60 watt incandescent light bulb lasts only about 1000 hours while the more energy efficient 12 watt Compact fluorescent lamp or CFL will last 10,000. But an even more energy efficient bulb is the LED, or light emitting diode bulb, which lasts 25,000 hours. Since LED light bulbs are super energy efficient and last a very long time (around 10 to 12 years depending on your usage), I’m planning on using them throughout my new house. Yes, LED bulbs cost more up front but the savings over time and the convenience of not having to change bulbs for a decade is worth the cost to me. When buying old school incandescent light bulbs, all we needed to pay attention to was the bulb shape, the wattage (which indicated the brightness of the bulb) and the screw base size to make sure the bulb would fit into the lamp. Then CFL’s came onto the market, and we had to think about the appearance of the light produced, most often described as soft white, bright white and daylight. Soft white has the warm tone of a traditional incandescent bulb, while bright white and daylight are more crisp, with a cooler, bluish appearance. And what about LED bulbs? Since many of us will be choosing LED’s for our new homes, let’s get a little bit more in depth about two options we’ll have to consider when choosing a LED bulb. • Brightness • Light appearance Brightness: Although wattage correlates with brightness in a traditional incandescent light bulb, that’s not the case for LED products. Since LED’s consume fewer watts of power, wattage does not correlate with brightness in an LED. What we need to look for when considering the brightness of an LED is Lumens. The lumen is the unit of measure for brightness and the watt is a measure of power. So, it’s the lumens that tells us how much light a particular lighting product emits. Here’s a point of reference: a typical incandescent 60 watt bulb emits approximately 800 lumens. So if you want an LED bulb that’s as bright as a 60 watt incandescent bulb, you’ll need to look for an LED bulb with 800 lumens. Another option we have to consider when choosing an LED bulb is Light Appearance. What I mean by light appearance is whether the light has a warm yellowish tone or a cooler, bluish tone. The Kelvin number will indicate the light appearance. The lower the Kelvin number, the warmer the light will be and the higher the Kelvin number, the more cool and blue the light will appear. Here’s another point of reference: the sun at noon on a clear day produces a light appearance of approximately 5500K. So if you want a very bright light somewhere in your house, you should should look for a LED bulb with a Kelvin number in the 4000-5000 range. Here’s my goofy way of remembering Kelvins: Lights with higher Kelvin numbers have a bluer, brighter appearance—so I think of the blue sky and the bright sun which are high up. And the opposite is true for lower Kelvin numbers. Bulbs with lower Kelvin numbers produce warmer, more yellowish light. The ambient lighting in a room is typically the main source of light and therefore a key element in setting the overall mood of room. Warmer white lighting is often preferred in living rooms and bedrooms to create a cozy atmosphere. Look for Kelvin numbers between 2700K and 3000K for this warm cozy effect.These warm white lights are also a good choice if you want to compliment warm earthy tones and wood furniture. A modern kitchen, especially a white kitchen, can benefit from a more neutral, cooler light, with Kelvin numbers in the range from 3500K to 4000K. These are considered neutral white and accentuate lighter colors better than warm white lights. Warm white lights in a bright white kitchen may make the space look sort of dingy and drab. Studies show that neutral and cool white light has an energizing effect on people, and is therefore are a good choice for kitchens and home offices. Cooler, brighter lights are a good choice for the main ambient light in bathrooms. The brighter light will provide a more realistic idea on what we look like in natural light. Look for Kelvin numbers between 4000K and 5000K for your main ambient bathroom fixture. 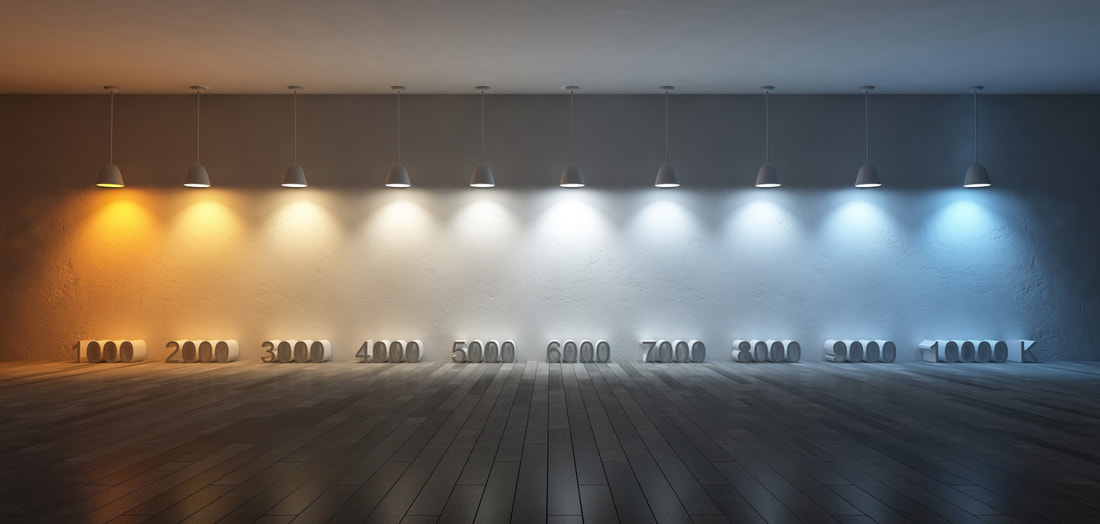
KELVIN TEMPERATURE COMPARISON
Although it is generally recommended that you use either all warm or all cool lights in a single space, here’s an exception. If you take lots of baths and want to create a warm cozy atmosphere in the tub area, consider adding an additional layer of warm white light near the tub to go with the more neutral general lighting in the bathroom. Choose a warm light around 2700K for your tub area that can be switched on separately from the main light. Here’s something else to consider about LED lights: Not all LED fixtures are built to be dimmable, so it’s important to look at the product label and ensure that the fixture is marked as dimmable. Most manufacturers provide a compatibility list that shows dimmer manufacturers and models that are compatible with LEDs. Using incompatible dimmers can lead to flickering lights or insufficient dimming levels. Alright, moving on to recessed lighting, the workhorse of the lighting world. Recessed lights can serve as ambient, task and sometimes even accent lighting. RECESSED LIGHTING Recessed lights are fixtures that are set into or recessed into ceilings or walls. Sometimes recessed lights are called cans because of their shape. One of the big questions that many homeowners have is what’s size recessed lights they should choose for their homes. They also want to know how far apart they should space them. So, let’s talk about that. Recessed lights come in multiple sizes ranging from 1" to 6" in diameter. Most people building new custom homes will choose either 4 inch or a 6 inch recessed lights. Ultimately the size you choose is a matter of personal preference, but consider this: larger cans produce broader amounts of light. With broader spans of light, you’ll need fewer recessed lights. Six inch recessed lights are a great option for larger rooms that need more light and they are a good choice for homeowners on a tighter budget who need to limit the number of cans they purchase. Smaller recessed lights produce a more narrow span of light, but the smaller lights are less conspicuous, and therefore thought of as more attractive. Smaller, 4 inch cans are more often seen in transitional, contemporary or higher end homes. With smaller cans, because they produce a more narrow span of light, you’ll need more fixtures to adequately illuminate a space. So go for 6 inch recessed lights if you’re more concerned with budget and choose 4 inch recessed lights if aesthetics are your priority. Now what about spacing those cans? To determine how far apart to space your recessed lights, divide the height of the ceiling by two. If a room has an 8 foot ceiling, you should space your recessed lights approximately 4 feet apart. Get it? 8 divided by 2 is 4. If the ceiling is 10 feet, you’ll want to put about 5 feet of space between each can. Another rule of thumb that I came across says that you should space 4 inch cans 4 feet apart and 6 inch cans 6 feet apart. Use these rules as a base line, though. Depending on the brightness or darkness of the décor in the room, the type and and brightness of light being used, and whether you are using the recessed lights for ambient, task or accent lighting, you may want to space the lights either closer together or further apart. A smart strategy is to “overlight” the room with dimmable lights and then control the brightness with dimmers. Now, let’s go over a few types of recessed lighting trim. The trim is the visible edge or plate around the outside of the recessed light. There are several types of trim that you’ll have to decide upon. 1. Baffle trim is most popular choice of all recessed lighting trims. This trim is great for use in living rooms, dining rooms, dens, and bedrooms. Baffle trim features uniform grooves along the inside walls of the fixture. These grooves are designed to absorb excess light and reduce glare. When in doubt, choose a baffle trim. 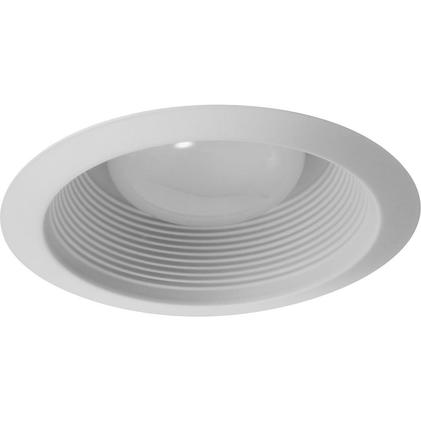
BAFFLE
2. Reflector Trims are for use in kitchens, very high ceilings or anywhere you want to maximize light. Reflector trims use a highly polished smooth interior trim to reflect and intensify the light produced by the bulb. 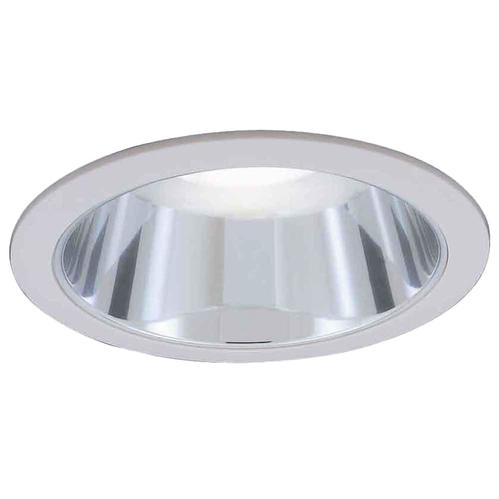
REFLECTOR
3. Adjustable Trims can be used in general lighting, task lighting, and accent lighting.This trim allows the bulb to move around in the housing unit and gives the user the ability to direct the light to a specific area. 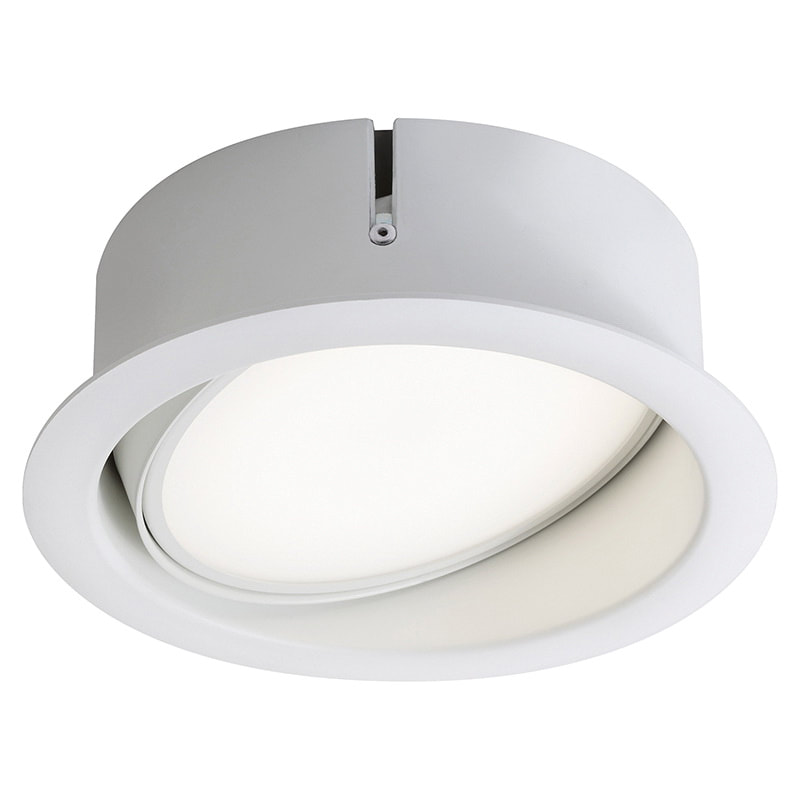
ADJUSTABLE
4. Lensed trims are used in moist areas. Recessed lights with lensed trims are designed to protect the bulb and the interior of the housing unit from moisture. They are the preferred choice for use in bathrooms, showers, and roof eaves. 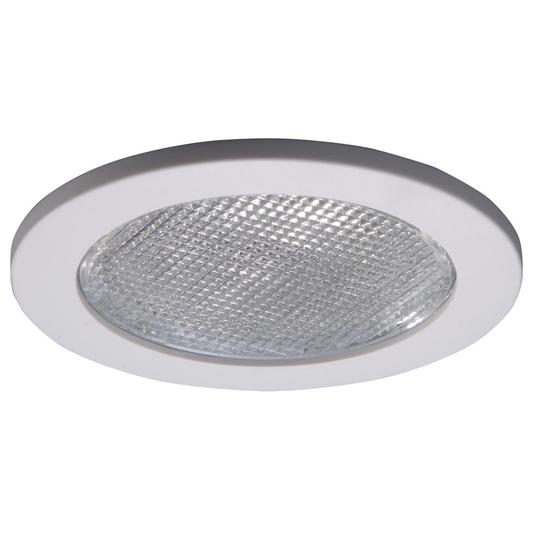
LENSED
Ok, finally, I have 12 lighting quick tips for you that should help you with your lighting design: 1. In narrow rooms, place lighting on the short walls of the room rather than drawing attention to the long narrow walls. This results in a wider looking space. 2. For narrow hallways, choose sconces that project light both up and down the walls and use scones on both sides of that narrow hallway to balance the space. 3. Entries should not be overly lit, otherwise the transition from outdoors to indoors can be disorienting. 4. Don’t think only in terms of down lighting, where the light is directed downward. Up lighting is also important. Think about adding pendants, scones or chandeliers that also cast light upward. This will help balance the light and make your rooms feel less gloomy. 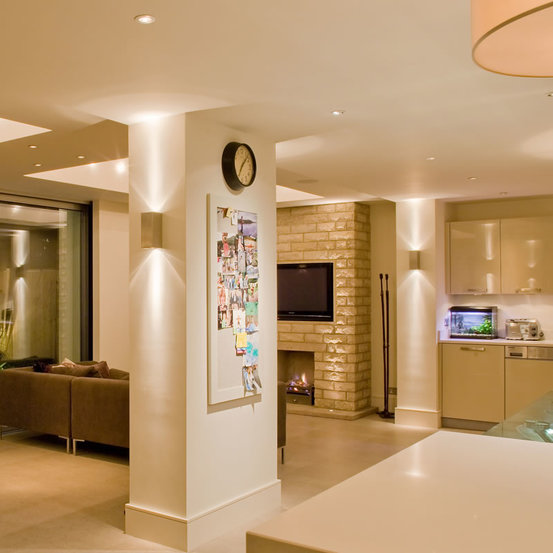
UPWARD AND DOWNWARD LIGHTING
5. A chandelier should not be your only light source in a room. Add in recessed lighting to help increase ambient lighting and to serve as task lighting. 6. Mark on your house plan exactly where you want all your lights to go, including the recessed lights, chandeliers, and scones. 7. Use IC housing rated recessed lights if the lights are going to be placed in the ceiling near insulation. IC stands for insulation contact. When recessed lights are placed in a ceiling that is not insulated, non-IC rated lights may be used. Keep non-IC rated recessed lights at least 3 inches away from any insulation. 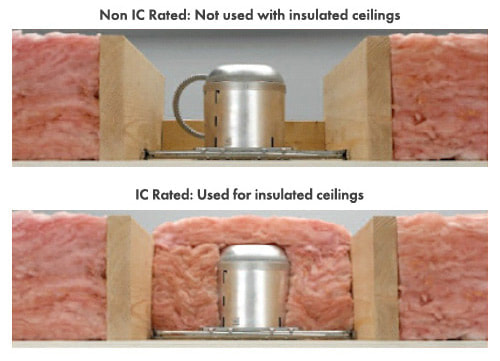
8. Center recessed lighting fixtures 12 to 18 inches in front of the objects you wish to light - a painting, bookshelf, or your face in the bathroom mirror, for example. 9. To ensure that you’re getting a safe product, look for the UL or ETL mark on the product or packaging. There are many LED products on the market, however they are not all create equal. The UL or ETL mark ensures the bulbs are safe to use and have been tested by an independent laboratory. The UL or ETL listing is not a requirement to sell products in the US, but if your project is going to go through an electrical inspection, products without those labels can be rejected by the inspector. Take a look at the show notes to see an example of the UL or ETL marking. 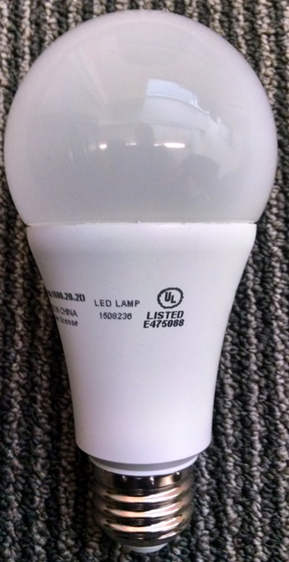
10. Choose your focal point first. If you have of a particular spot in a room where you know you want a recessed task light or chandelier, that should be your starting point for your lighting layout. Then fill in the space around that spot with recessed lights. When laying out recessed lighting in a kitchen, for example, you might want to be sure there is a light above the stovetop and the sink, then fill in recessed lights around those. 11. If you prefer to simply space the recessed lighting evenly around the room without any particular focal point, place your first light in the center of the room and fill in from there. 12. Do NOT put a recessed light directly over where you stand in front of the bathroom vanity. That downlight will produce large unattractive shadows on your face, making shaving and doing your hair and makeup challenging. The best place to put lights for your bathroom vanity is on both sides of the mirror AND above the mirror (not above your head, but above the mirror). If you can’t manage to do both of those, the second best option is put lights for your bathroom vanity either on both sides of the mirror OR above the mirror. The worst thing you can do is put a recessed light in the ceiling right above your head. 
Before I let you go, let’s do a couple of quiz questions. QUIZ: 1. True or False. Recessed lights can be used for ambient, task and accent lighting. That’s true. I call recessed lights the work horses of the lighting world. They have so many functions. 2. True or False. The higher the kelvin number, the brighter and bluer the light will appear. That’s true. Bulbs with higher kelvin numbers produce brighter bluer light and bulbs with Lower kelvin numbers produce warmer more yellowish light. Well, that’s it for this week. I hope you learned as much as I did. And I hope you’ll keep on listening to Build Your House Yourself University--BYHYU. Remember, the purpose of this podcast is simply to educate and inform. It is not a substitute for professional advice. The information that you hear is based the only on the opinions, research and experiences of my guests and myself. That information might be incomplete and it is subject to change, so it may not apply to your project. In addition, building codes and requirements vary from region to region, so always consult a professional about specific recommendations for your home.
0 Comments
Your comment will be posted after it is approved.
Leave a Reply. |
 RSS Feed