As I was going over the lighting plan for my new house, I wondered if there were different rules for lighting rooms with tall ceilings as opposed to standard 8 foot ceilings. Is ok to use the same type and average number of recessed lights throughout your house, no matter a room’s function or ceiling height? Does a 2 story foyer or rooms with vaulted ceilings need special lighting considerations? One of the biggest problems with the house I currently live in is that the rooms are dark. The lighting is not bright enough and it’s too yellow. In the house that we’re building, I want to make sure that we choose recessed lights and lighting fixtures that will adequately illuminate our house (which I’m finding becomes increasingly important as I get older and my eyesight gets poorer). I don’t want to have to pull out my iPhone light, like I do now, to tell the difference between navy blue and black pants, or to do certain tasks. I want to be able to turn on a room light and see everything I need to see. Worse than not installing enough canned lights and lighting fixtures, is wasting money by having an appropriate number of fixtures, but fixtures that don’t put out adequate light in specific situations, like in rooms with tall ceilings. I did some research about how to light rooms with tall ceilings, which many of us will have in our new builds. The information was much harder to find than I anticipated. But, after days of searching lighting design, electrician, lighting manufacturer, and retail lighting websites, I came up with a few tips for some basic guidelines for lighting rooms with ceilings greater than the standard 8 feet. Most of you are ready for the information in this episode because you've reviewed the basic light principles and terminology in last week’s episode called Lighting 101. You might also want to listen to episodes 125 and 125.5 where, between the 2 episodes, you will get 71 lighting and electrical plan tips that will help you think through the best locations for lights, electrical outlets and light switches. Before we move on to those tall ceiling lighting tips, I wanna give a shout out to Raina Lael from Canada, for an iTunes 5 star rating and review. You’re welcome Raina and thank YOU for listening on your commute to work. Ok, let’s get to this week's tips. To be clear, we may be able to get away with using standard lighting recommendations if we’re planning for 9, or even 10 foot ceilings, but the taller the ceiling, and the more important having a well-lit house is to you, the more important it is to incorporate some of these tips for lighting rooms with tall ceilings. 1. Use long-lasting LED bulbs or fixtures. The higher the ceiling, the more inconvenient (and dangerous) it is to change ceiling fixtures and light bulbs. Many LEDs allow for 50,000 hours of use. This is approximately 50 times longer than a typical incandescent bulb, 20-25 times longer than a typical halogen, and 8-10 times longer than a typical CFL (compact fluorescent lamp). Used even 12 hours a day, a 50,000 hr LED bulb will last more than 11 years. That long lifespan is exactly what we want when we have high ceilings with recessed bulbs that are hard to reach. There are now even fixtures and recessed lights that are made with integrated LED light sources instead of removable bulbs. These are also long-lasting, but be warned that the entire fixture will have to be replaced once the LED light source has run its course. 2. Choose recessed lights with a more narrow beam angle. A beam angle, also called beam spread, indicates the angle or spread of light that extends across the floor when a ceiling light fixture is turned on. Most LED lights are available in variety of beam angles. A wider beam angle gives less concentrated, softer light across a wider area of the room. A narrow beam angle gives more intense, concentrated light that can more easily reach the floor from a high ceiling. In rooms with tall ceilings, light from recessed cans with the typical beam spread is often too soft and diffuse to adequately illuminate the floor level. 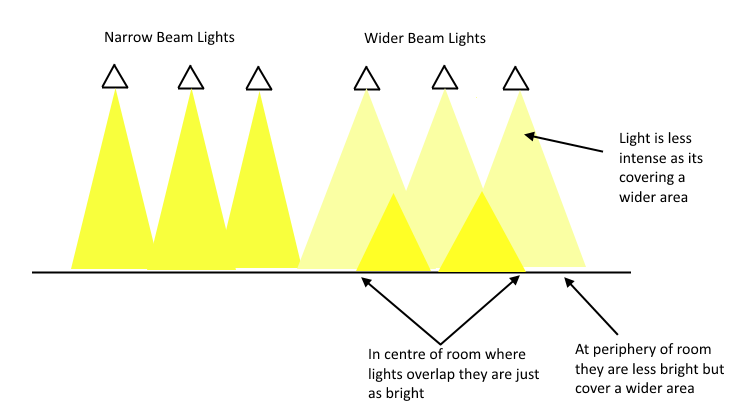
A more narrow beam spread of less than 50 degrees is recommended for ceilings higher than 9 feet. In addition, more recessed lights will be needed. For standard 8 foot ceiling heights, a wider beam spread of 60 degrees or more is recommended. The softer you want the light, the wider the beam angle should be. The more focused you want the light, the more narrow you want the beam angle. And since it’s difficult to get light from a tall ceiling to the floor level, you need more concentrated, focused light. Consider narrow beam angle recessed lights of about 30 degrees in rooms with tall ceilings that need more intense task lighting, like in the kitchen and bathroom. Remember, for tall ceilings we want a beam angle of 50 degrees or less. 3. Spread your light across the entire area of the room. Rooms with high ceilings especially need light that is spaced evenly across the entire of the ceiling so light spreads uniformly around the room. Start with your focal point lighting fixture, like a chandelier, and place recessed lights evenly around that focal point light. In rooms where you’ll be using only recessed cans, space cans evenly around the room, typically every 4 to 6 feet apart. Don’t forget to place recessed lights over areas where task lighting will be needed. Keep in mind, you want to have the task lighting source placed in front of you, not behind you where your body will cast a shadow on your workspace. 
4. Don’t place recessed light too far away from walls. In a room with a high ceiling, it's important to illuminate the upper part of the walls so the room doesn’t look cave-like and spooky. Place some of your recessed lights close enough to the walls so that the walls get a soft wash of light. Walls don’t need to get abundant light, unless you want to highlight an architectural or decorative feature. But placing a row of recessed lights about 2-3 feet from the wall is a good general rule of thumb to get the right amount of light on walls. 
5. Choose recessed lights with reflector trim. The trim of a recessed can is the visible part of the fixture that surrounds the bulb. Different types of trim direct and, intensify or soften the beam of light coming from the bulb. Reflector trim is the best choice for high ceilings or anywhere you want to intensify and maximize light, like in kitchens. The highly polished, smooth interior surface of a reflector trim reflects and intensifies light. Reflector trim focuses and increases the amount of light, helps to make the beam angle more narrow, and makes the light brighter, which is just what’s needed for rooms with high ceilings. 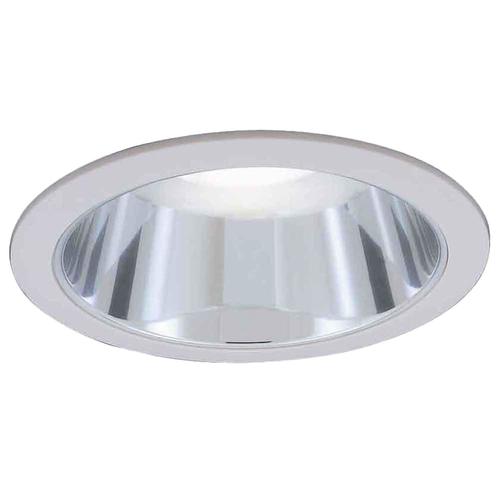
REFLECTOR TRIM
Pop Quiz: Do you remember the most commonly used trim for recessed light? It's not a reflector trim. It has a ribbed interior and is used in most homes to dim and soften light. It’s baffle trim. Baffle trim is better for standard 8 foot ceilings and might work okay in rooms with 9 or 10 foot ceilings where dimmer light is needed, like the bedroom. But wherever you have very tall ceilings, say 12 feet high or more, or when lots of focused light is needed, like in a kitchen or bathroom, request reflector trim. 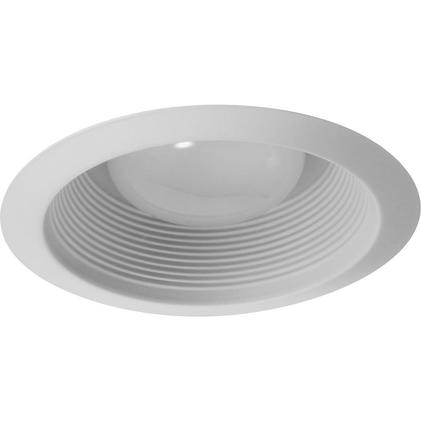
BAFFLE TRIM
6. Choose 6 inch recessed cans for the most options. Because they cover more area than 4 inch recessed lights, 6 inch cans work well in rooms with high ceilings. 6 inch cans are the most popular size of recessed lights on the market. As a result, 6 inch recessed lights have more options for trim style and trim color. Plus, more beam angle options are available for 6 inch bulbs as compared to 4 inch bulbs. Higher end homes, or those with a more contemporary style, sometimes use 4 inch cans. And that’s fine, but realize you will have fewer trim and bulb options, and you will need more of these smaller cans to illuminate a room with a higher ceiling. 7. Don’t be afraid to go big. Rooms with high ceilings, and large rooms, in general, often need larger lighting fixtures that can spread light over a larger area, without leaving some sections of a room in the dark. If there is ever a place to put an oversized chandelier (or even 2), it’s a room with a high ceiling. You can also install a cluster of pendant lights as you would a single hanging chandelier. The higher the ceiling and the larger the room, the more oversized your lighting fixture can be. A quick rule of thumb for sizing a chandelier is the add the length and width of a room together, then change the dimensions to inches. That number is the minimal diameter/dimension needed for your chandelier. For example, if your living room is 20x15 feet, add 20 and 15 to get 35, then change feet to inches. That means a chandelier with a 35 inch diameter is the smallest you should choose. You can go larger, especially if you have high ceilings, but not smaller. Many designers say that one of the biggest mistakes they see with lighting is homeowners choosing fixtures that are too small. For vaulted or 2 story ceilings, strongly consider a light fixture with some depth, or multiple tiers, to fill the vertical space. 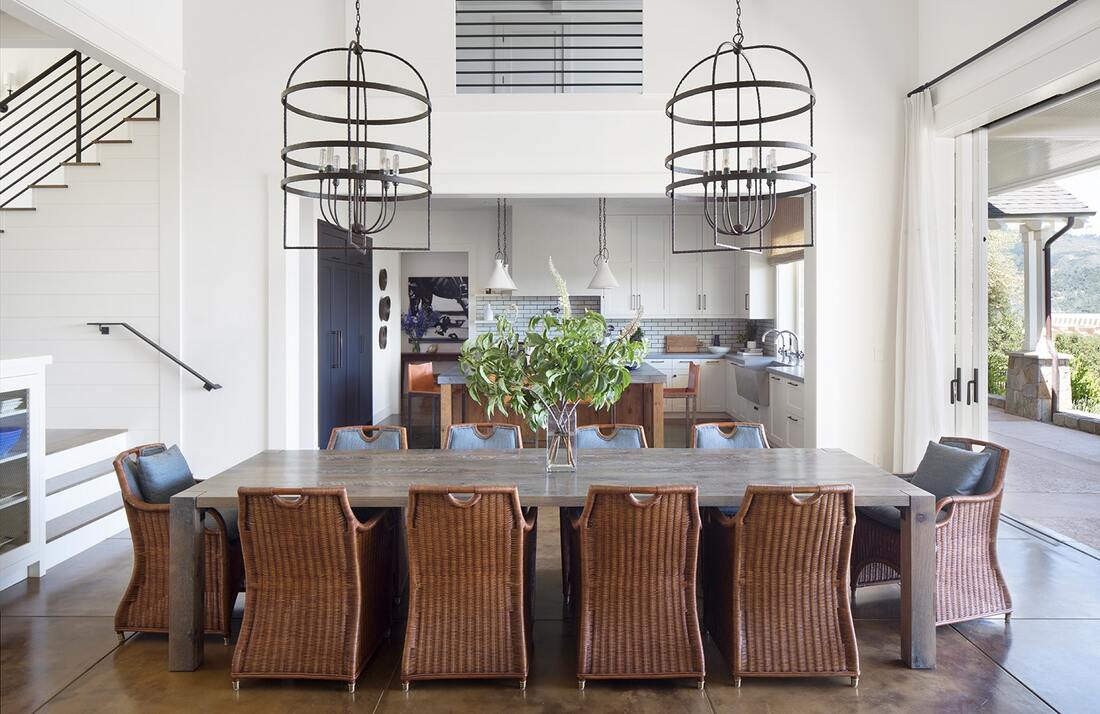
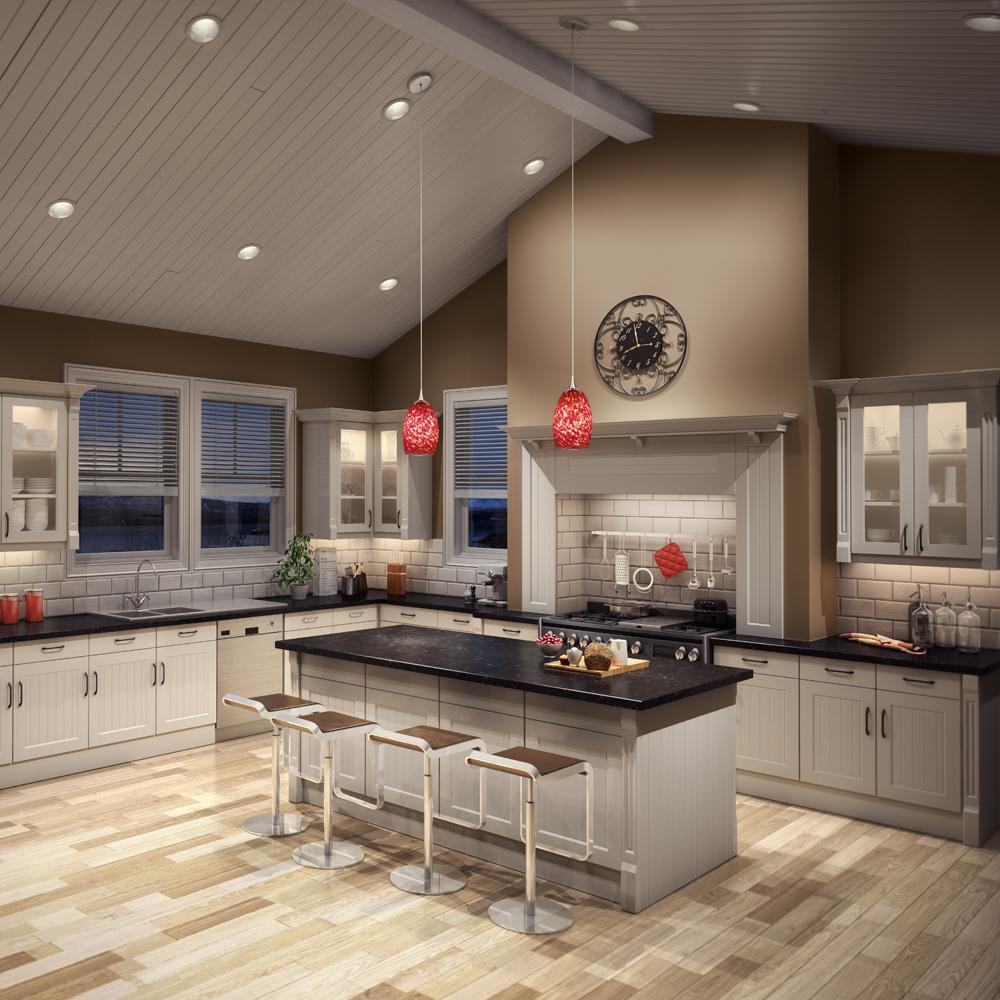
8. Hang a chandelier about a third of the way down from the ceiling. In a room with a 9-foot ceiling, the chandelier or pendant grouping would hang about 3 feet from the ceiling. If you have a 2 story room and want to make the room feel a bit cozier, you can hang the fixture a little lower than a third of the way down to draw the eye lower and de-emphasize the vastness of the space. 9. Don’t use standard recessed cans for vaulted or sloped ceilings. In order to make sure the light from recessed cans is directed downward, choose cans specifically made for sloped ceilings. 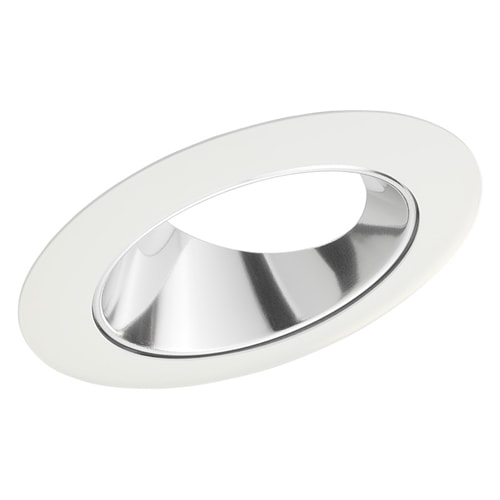
10. Apply the rule of thirds. The rule of thirds has you split the wall into 3 equal, balanced parts - the top, the middle, and the bottom. These are your three different "design levels." Furniture is in the bottom third of the room, artwork or other wall hangings are in the middle, and the top third often used for lighting. But lighting shouldn’t only go in the upper third of a room, especially a room with a high ceiling. Putting lights in each third of a room makes a space with tall ceilings feel fuller and less intimidating. Add table lamps to light the bottom third of the room. Taller floor lamps, wall sconces, or low-hanging pendants can go in the middle. The top third should have recessed cans, strip lighting for coves, flush mount fixtures, chandeliers and/or pendants. Track lighting and wall scones, depending on the direction of the light, can be used to illuminate the top, middle or bottom thirds of a room. 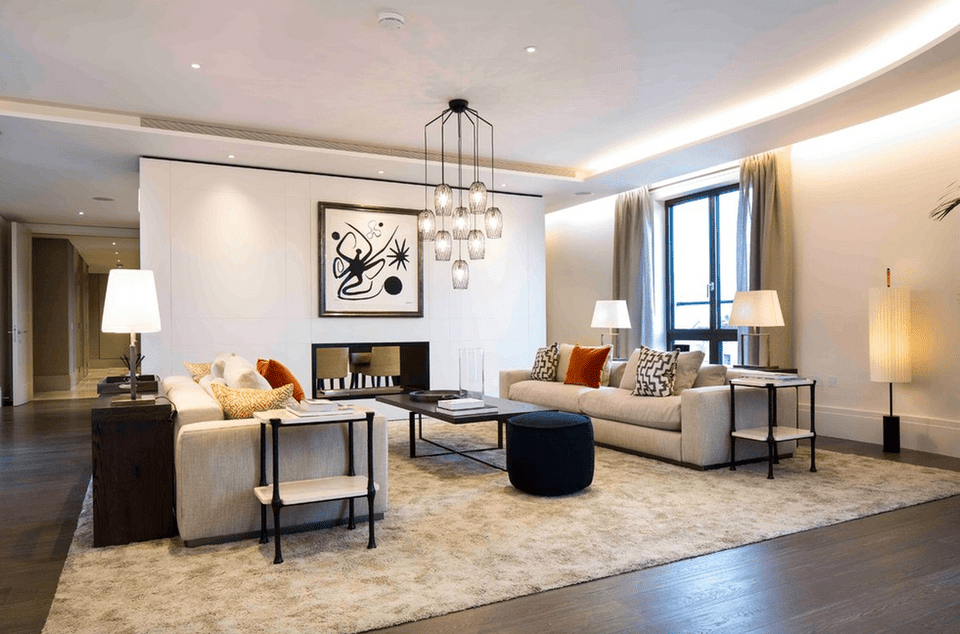
11. Include enough lumens for the space. Lumens are measurement of light, and sometimes refer to as “brightness” or “light output.” As a point of reference, a standard 100-watt old school, incandescent light bulb produces about 1,500 – 1,700 lumens. You want all your rooms to have enough lumens, but it’s especially important for rooms with tall ceilings. For adequate light, rooms with tall ceilings will need more lumens than a comparable room with standard 8 foot ceilings. Again, that’s because it can be difficult to get light coming from a tall ceiling to project to floor level, where light is most needed. To determine the number of lumens needed for a room, take the room’s square footage (which is length x width) and multiply it by a brightness factor called foot candles. Different foot candles are needed for different rooms. Bathrooms for example, need 80 foot candles per square foot. So a 10x10 foot bathroom (which is 100 sq feet) will ideally have 8000 lumens. A bedroom needs 20 foot candles per sq ft, so a 100 sq ft bedroom will need 2000 lumens. That means all the lights in the room should add up to 2000 lumens. Most lighting fixtures and light bulbs made by reputable manufacturers should list its number of lumens. Look at the chart below for the recommended number of foot candles per room. For rooms with very tall ceilings or dark walls, you might want to add 10 to 20 more foot candles per square foot to each room. Room: Foot Candles Needed Per Square Foot Living Room: 10-20 ft candles per sq ft Kitchen General: 30-40 ft candles per sq ft Kitchen, above the Stove: 70-80 ft candles per sq ft Kitchen Sink: 70-80 ft candles per sq ft Dining Room: 30-40 ft candles per sq ft Bed Room: 10-20 ft candles per sq ft Hall Way: 5-10 ft candles per sq ft Bathroom: 70-80 ft candles per sq ft 12. Go for bright lights, plus dimmers. You might have some hesitation about putting bright lights with narrow angle beams, reflector trim and lots of lumens in some of your rooms— rooms where you know you will want to sometimes chill out and be surrounded by softer, more romantic lighting. I get it, but designing your lighting to be bright when needed and adding dimmers can give you the best of both worlds. In rooms with ceilings higher than 10 feet, you’ll definitely want to go brighter. Then use your dimmer for times when bright light isn’t needed. Many electricians recommend putting a dimmer switch in every room of the house. Dimmers give you options. And choose a bulb with Kelvins around 3000-4000 to give you neutral, white light, which your eye will perceive as brighter. If you don’t know what Kelvins are, take a listen to last week’s episode. So start bright and dim down. You’ll thank me for this advice when you turn about 45 years old 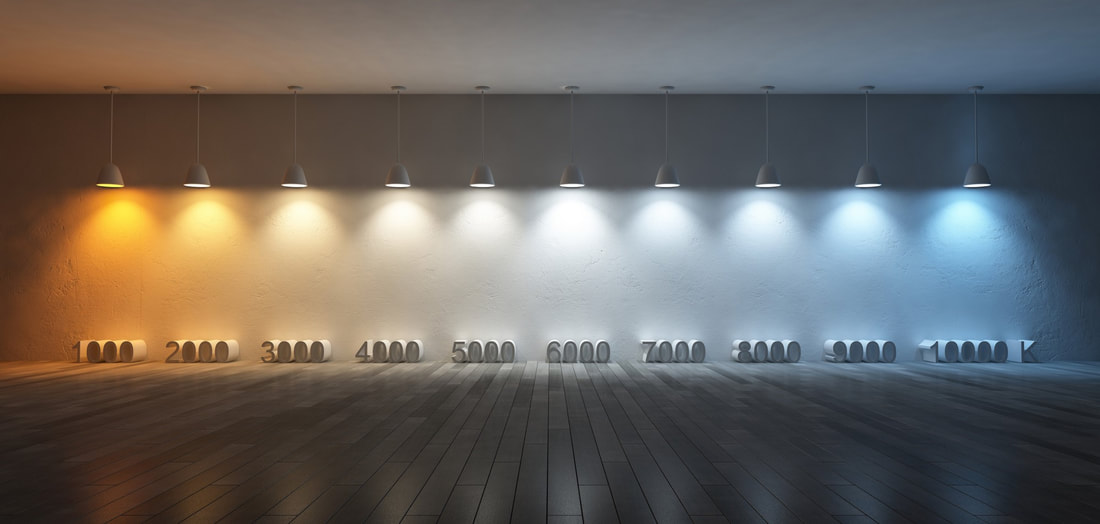
That’s it for this week. I hope you learned as much as I did. Don’t forget to subscribe to the show, so new episodes will automatically be added to your podcast library or inbox as soon they are available. That way, you won’t have to try the name of the show, website or our day of release. Thanks for stopping by this week. I hope you'll join me again next week for another episode of BYHYU.
1 Comment
j. garcia
9/21/2022 10:27:43 pm
Very well written, clear and precise. Excellent site. Lighting product reps should be required to read your site. Attended a lighting show in Los Angeles today and the lack of knowlege was breathtaking. Your comment will be posted after it is approved.
Leave a Reply. |
 RSS Feed