Aging In Place Features--Universal Design That Will Make Your Home Accessible At Any Age—BYHYU 24311/24/2021 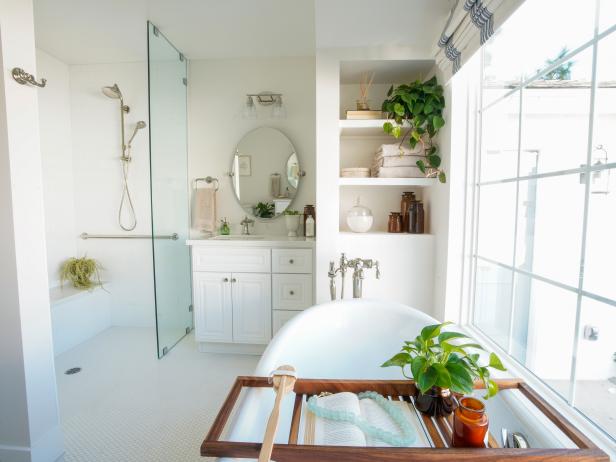
Many of us are building our houses with the intention of staying there for the rest of our lives. We’re building our forever homes. And there are some fairly simple design choices we can make that will allow us to stay in our homes comfortably even as seniors. The aging in place features we’ll discuss here will give us a greater level of safety, independence and happiness in our homes— no matter what our age. From choosing the right floors to prevent falls to making choices that will work for us if we ever develop arthritis, or need a walker, we can make intentional, but subtle design decisions today that will serve us throughout our time in our homes. And those designs will make our homes no less beautiful. Betsy DH, this one’s for you.
,
Before we go through our list of aging in place features that we should consider for our forever homes, I gotta thank Brian S. Brian is a newly licensed builder who called the podcast a new builder training course. What a compliment! Thank you being brave enough to let everyone on Apple Podcasts know that even builders might find our little ole podcast helpful. You rock too, Brian! Thank you sir! Now let’s get into those aging in place features that we can add to our forever homes. What’s worse than having to live with some of the physical challenges that can come with getting older is having to live with those challenges in a house that is difficult to maneuver, or having to leave our homes because we can’t live in them safely. Strongly consider adding some of these features just in case you need them as you get older. Many design features that we’ll talk about today fit into the category of universal design. Universal design is defined as design that allows anyone of any age, or anyone with any level of mobility, to enjoy and live in a space. I talked about many universal design and aging in place design elements in episode 68 called Designing a Forever House. Take a listen to that show for more detailed information, but let me quickly give you the list of aging in place features discussed in episode 68. 1. Avoid steps or make climbing stairs an option, not a necessity 2. Install lever door handles instead of knobs 3. Choose base cabinet drawers, not doors 4. Buy comfort height toilets 5. Rethink your bathroom vanity design and make them comfort height 6. Choose a curbless shower with easy to clean shower walls
7. Choose an open floor plan with ample clearance in hallways, walkways and doorways (you gotta listen to that show/post for the specific dimensions)
8. Raise some of your appliances so you’ll have less bending and stooping to do 9. Make kitchen islands counter height or table height 10. Invest in a generator 11. Choose non-slip, comfortable flooring 12. Locate your laundry room near your bedrooms and baths And this last one is more about convenience than accessibility… 13. Make sure you have enough room for your adult children and their visiting families Okay, that was a summary of Designing Your Forever House, episode 68 Here are a few more features that we can add to our new builds that can keep us comfortable and safe in our homes as we get older. 1. Choose rocker panel light switches The more economical and more commonly used, generic toggle switches that are in most homes can be more difficult for seniors to use. We all know what a toggle switch is. It’s the quintessential light switch that most of us think of when we think of light switches. Those are switches we should avoid. Instead, choose rocker panel light switches. Rocker panel light switches are those flattish rectangular switches that companies like Legrand sell. Hand eye coordination can decrease as we age, so the larger rocker switches are easier for seniors to control. 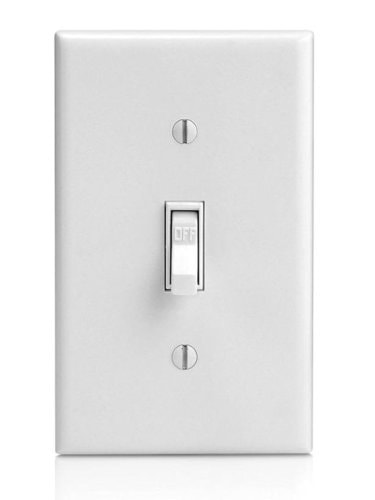
TOGGLE SWITCH (CHALLENGING FOR SOME SENIORS)

ROCKER SWITCH (BETTER AGING IN PLACE OPTION)
2. Choose awning-type, slider or casement window units instead of double hung or single hung windows. Awing windows, casements and slider windows are easier to open and close as compared with double hung and single hung windows which take quite a bit more strength to open. 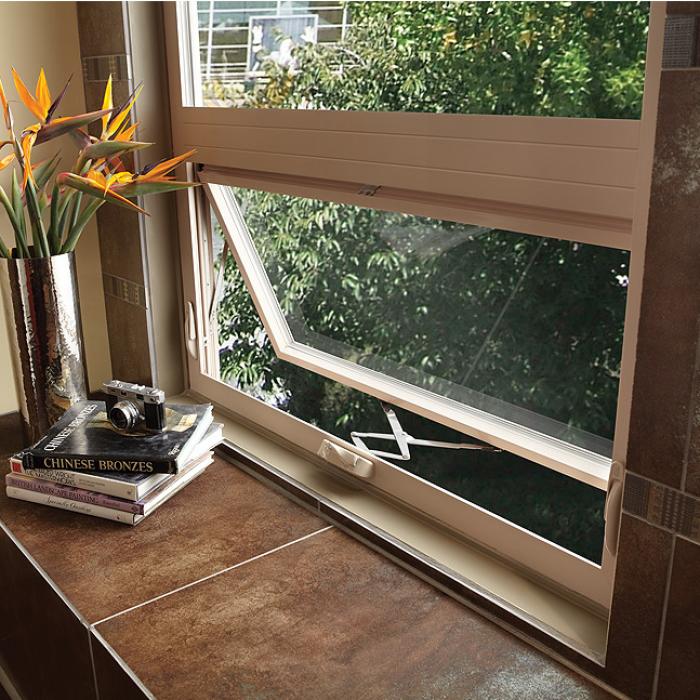
AWNING WINDOW
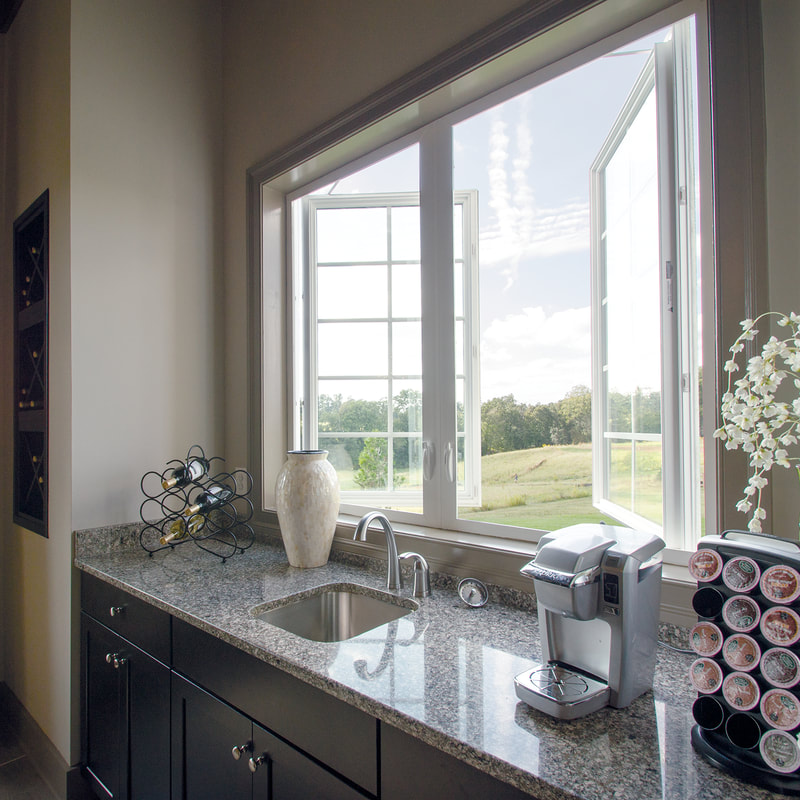
CASEMENT WINDOW
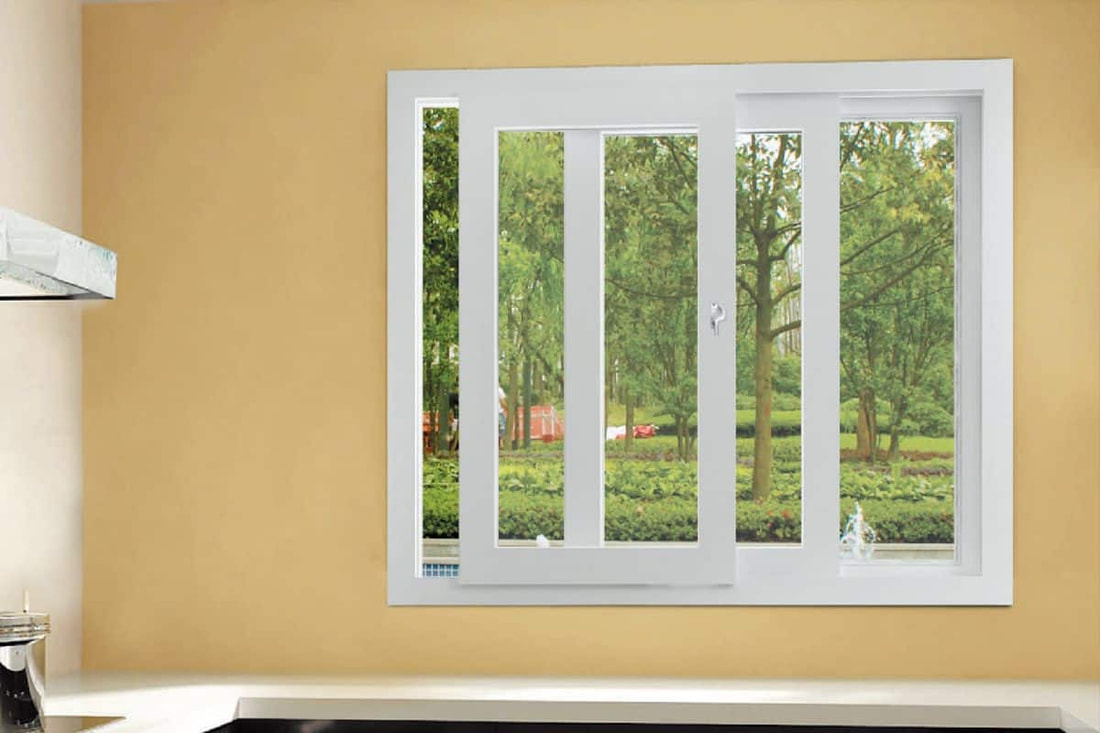
SLIDER WINDOW
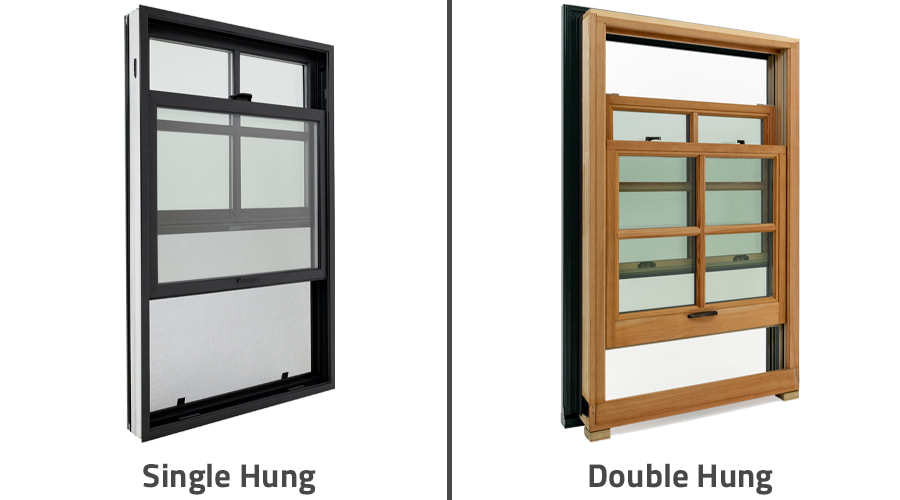
MORE CHALLENGING FOR SENIORS
3. Consider adding home automation and smart devices. Installing a smart home voice command system like Alexa or Google Home and/or smart door locks, automated window shades, lighting, or thermostats are helpful for older homeowners. Smart technologies can save us a few extra steps by automating many tasks. You can set those devices to automatically turn on or off depending on the time of day, temperature, or other parameters you decide. Smart locks let you lock and unlock doors automatically as you come close to the door with an electronic remote control key fob. Or they work with the tap of a finger, with your smart phone, or with simple voice command. Actually there are so much information about smart locks that they deserve their own mini lesson, so look for that in the near future. But smart locks will help you avoid scrambling for your keys when your hands are full. And they are much less challenging than putting a key into a relatively small, narrow keyhole, which can become more difficult to seniors with arthritis, poor eyesight and decreasing hand eye coordination. It may sound counterintuitive to recommend smart devices for senior living, but smart technologies can be controlled from our tablets or smart phones where we can more easily see and operate the controls. 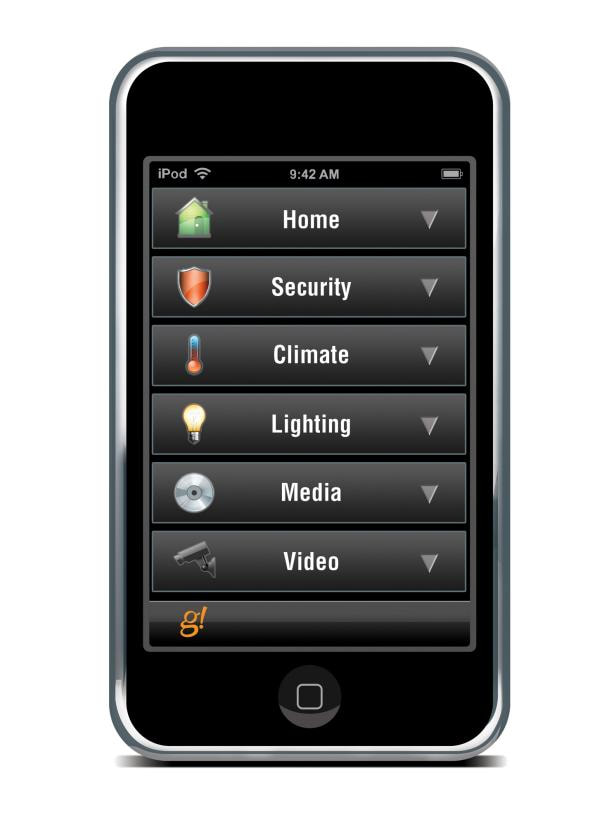
4. Install LED lights. Changing light bulbs can be a fall hazard for seniors. To reduce how often you’ll need to change light bulbs, choose LED lights which can last for many years, depending on usage. 5. Add 3 way light switches liberally. A 3 way light switch allows you to control a light from two separate locations. 3-way switches are often located at both the top and bottom of a stairway, at each end of a hallway or next to doors in a room with more than one entry point, like a living room. 3 way light switches will save us extra steps in the dark. Having ample light will decrease accidents for everyone, but especially for older folks whose balance may not be the best. 6. Install electrical outlets at 18-to-24 inches off the floor to reduce how far you’ll have to bend down to access them. 7. Locate the master bedroom and bathroom on the ground level if you decide on a multilevel home. 8. Be generous with lights. As you get older, you’ll need more light to see well when doing common tasks such as cooking, reading and threading a needle. Make sure your electrical plan includes plenty of light, not just inside rooms, but also along hallways and near steps. Most experts suggest that you overilluminate spaces and use dimmers on almost all switches to decrease light and create ambience as needed. And don’t forget to add outdoor lights along walkways and paths, near entrances and on porches and balconies. 
9. Design your shower for wheelchair and walker accessibility. Build your shower with a flat, curbless entry that is at least 36” wide so it can easily be accessed if you ever need a walker or wheelchair. A roll in shower stall where you stay in the wheelchair while taking a shower should be at least 36”x 60”. A transfer shower where you transfer from the wheelchair to a shower bench should be at least 36”x36” square. You can add a built in bench or a flip up bench that sits flush against the wall when not in use. Now hopefully you will never need a wheelchair or walker, but if you build a shower with these dimensions in mind, accessibility won’t be a problem in the future. 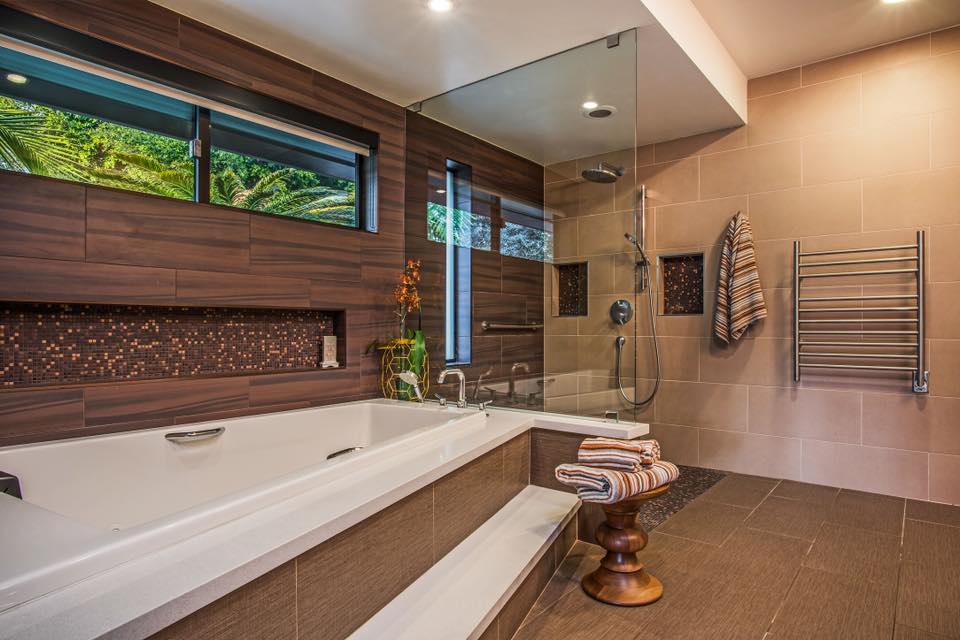
ROLL IN SHOWER
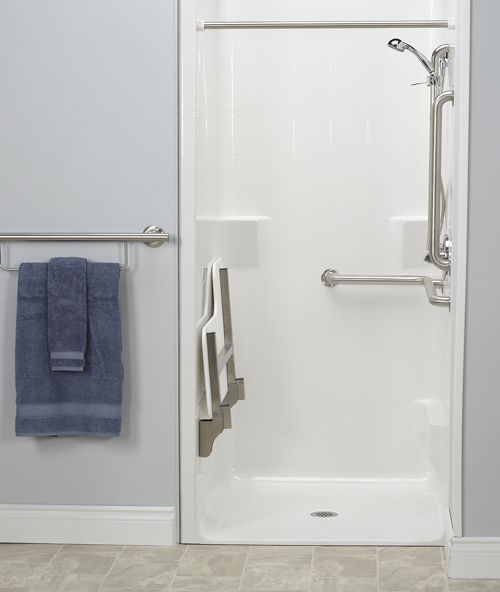
TRANSFER SHOWER
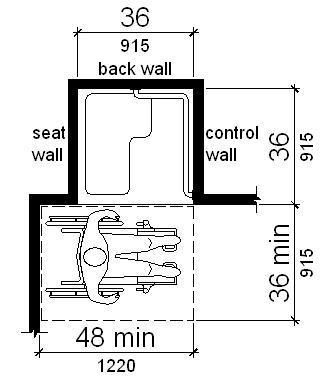
TRANSFER SHOWER
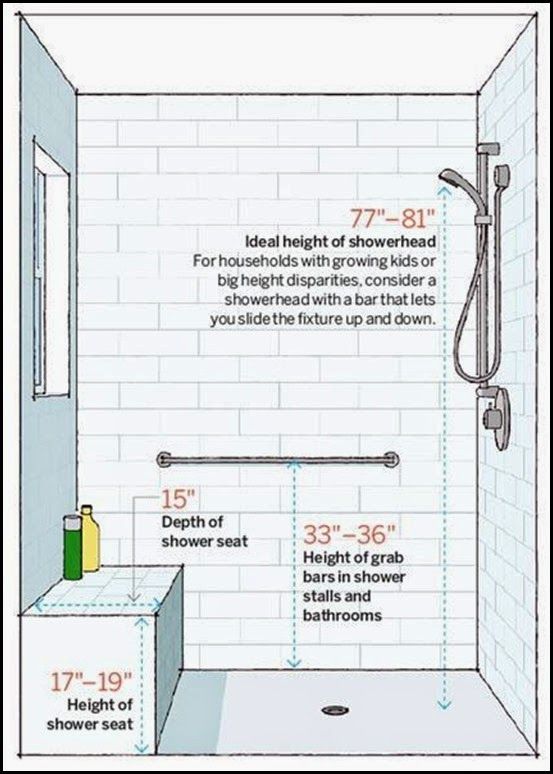
10. Add blocking for future grab bars in showers and around toilets. Blocking the walls means adding support at the point where grab bars can be securely attached. That extra support typically comes in the form of extra wood between wall studs. You don’t want to rely on suction cup grab bars that are attached to the surface of the walls. Nope, those are not veery secure. Instead add blocking to your walls so grab bars can be screwed in place if ever needed. Let’s consider the ADA (Americans with Disabilities Act) requirements for grab bars which we can use as a guide for placing our blocking. The ADA requirements are much more complex than you might expect, so I’m going to give a quick summary here. For more detail, here's a link where you can see the specific ADA requirements for yourself. But here’s a quick guide... The ADA says that grab bars near toilets should be installed horizontally, 33-36 inches above the finished floor as measured to the top of the grabbar. The grab bars should go on the sidewalls near the toilet. If you have two walls on each side of the toilet like you would in a separate water closet/toilet room, then add blocking on both side walls. Sidewall grab bars should be at least 42 inches long, but preferrably 48-inches long. That means your toilet side wall blocking should extend for a distance of at least 42-48 inches. And again, that’s 33-36” above the finished floor. An additional grab bar measuring at least 36 inches long should also be installed behind the toilet on the rear wall. 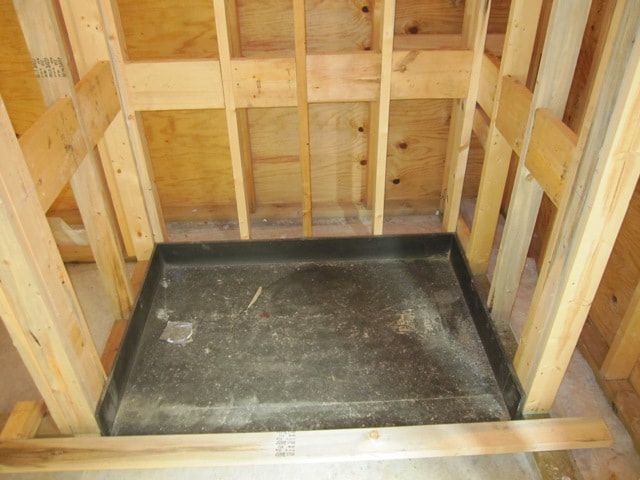
SHOWER BLOCKING
Now what about shower grab bars? Grab bars requirements vary depending on the type of shower you have. But to be safe, you might just plan on adding blocking on all walls of your shower. Blocking is relatively inexpensive so it’s ok if you go a little over board here. You can add blocking around your entire shower at the same height I just mentioned, 33”-36” from the floor. That way, your shower walls will be ready for grab bars wherever they’re needed in the future. And make sure the grab bar blocking extends all the way to the shower entrance so you add a grab bar there for extra stability as you enter the shower stall. Finally, for future reference, take photos of the blocking before covering the bathroom walls with drywall or cement board. 11. Consider an induction cooktop. Induction cooking is a cooking technology that produces heat with magnetic energy, instead of thermal energy. When using an induction cooktop, you have to use pots and pans made of a magnetic metal, such as cast iron. Induction cooking provides faster, more consistent heating and increased energy efficiency than cooking with gas or electricity. 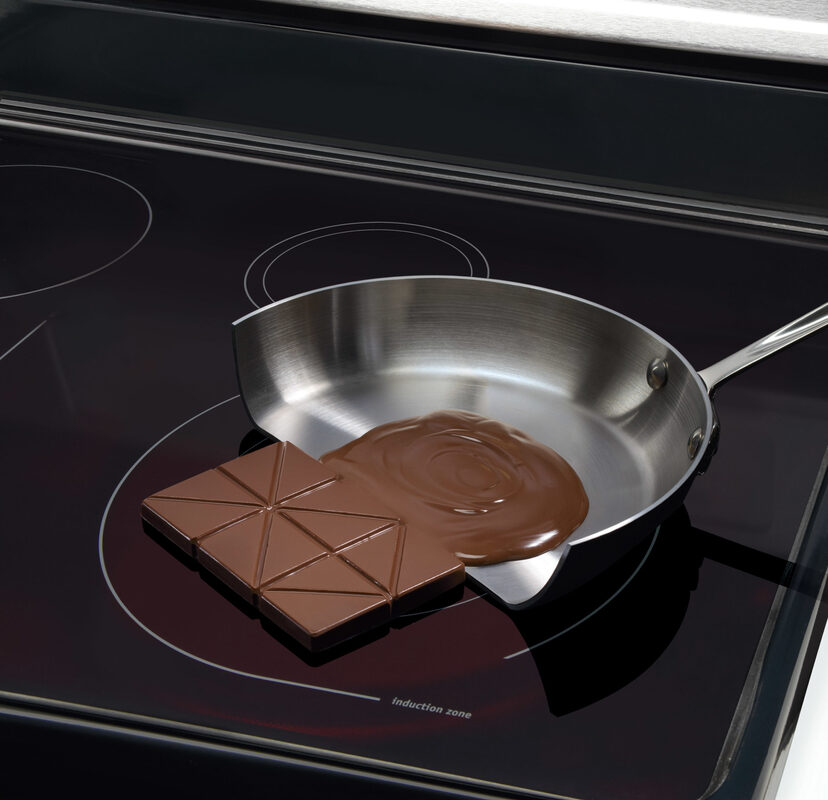
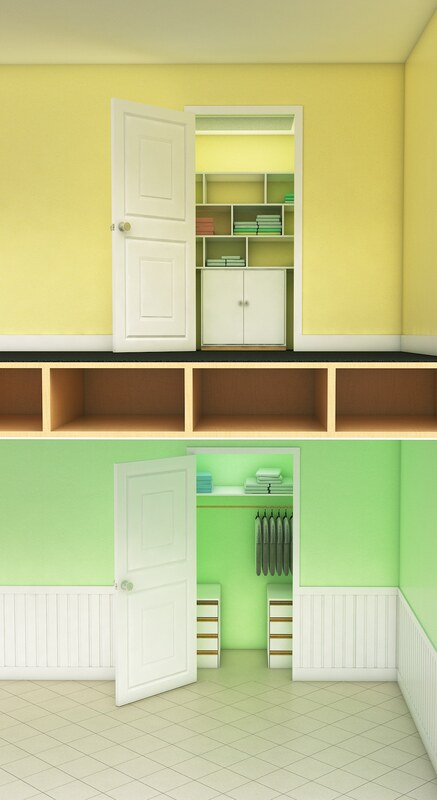
And Induction stoves are great for aging in place, forever homes because they are safer than electric or gas stoves. Induction stoves only heat up items made with iron/magnetic particles. Heat can only be transmitted through magnetic cookware. The induction surface is cool to the touch and won’t burn dish towels, clothing, pot holders or hands. 12. Add stacked closets as a potential elevator shaft. If you are building a forever home that’s multilevel and you have the budget, you could add an elevator when you build. But prices for home elevators vary from about $20K-50K, so many people would rather wait and see if they will actually need an elevator before they add one. What you can do fairly inexpensively now is add stacked closets in your house, which can later be converted into a home elevator shaft. Design storage closets directly above each other on each floor of your house.
If you are seriously considering designing a space for a future elevator, do some research with an elevator company about the specifics of the dimensions of the shaft space you’ll need. But here are some loose guidelines. Most home elevators will fit within stacked closets that 5’ wide x 5’ deep (meaning from 5’ from front to back) and however tall your ceilings are. You’ll also need to carve out a recessed space just below the lowest level for the elevator pit. The elevator pit is a depression that sits below the elevator when it is on the lowest floor. That pit allows the elevator floor to sit level with the floor of the lowest landing. Converting stacked closets into an elevator shaft can save thousands of dollars compared to adding an elevator to an existing home. 13. Avoid extra soft, extra low, extra deep seating. Deep, plush, low profile seating like Cloud sofas are very much on trend and they are definitely luxurious, but they can be more difficult for seniors to navigate. A fully down and/or feather filled seat cushion that’s more than 36” deep usually doesn’t offer enough support for seniors, especially as they are trying to stand from a seated position. Instead, look for seat cushions that have foam core for more support. A foam core seat cushion wrapped with down, feathers or a down alternative gives you the best of both worlds. You get plenty of support from the foam core, and you will enjoy some plushness from the soft down, feather or down alternative wrapping. By the way, a bonus here is that those foam core cushions don’t need to be fluffed and smoothed out all the time like fully feather and down filled seat cushions do. Seat heights of 18 or 19” high are much easier for seniors, and almost anyone, to sit in and stand from. So again, for a sofa or chair that will work well for us as we age, look for a depth of no more than 36 inches, a seat height of no less than 18 inches and seat cushions with a down or down alternative wrapped foam core. 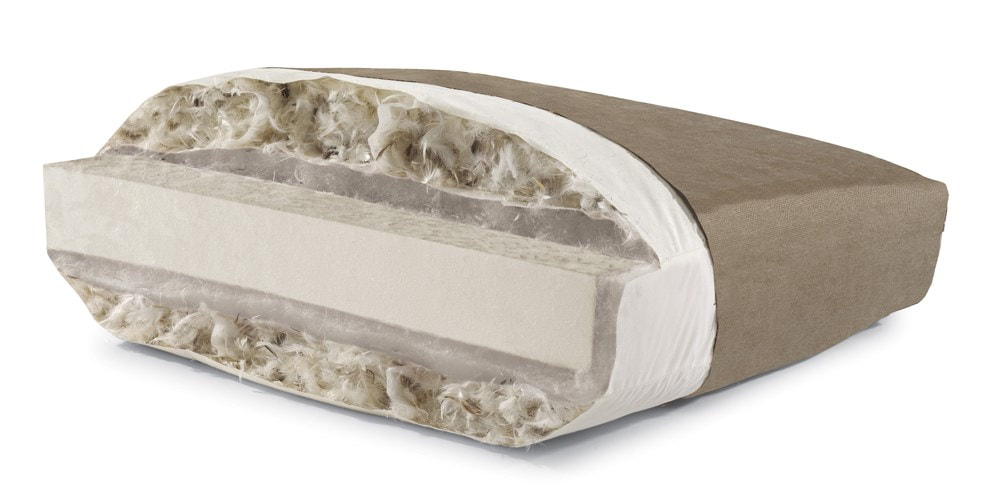
DOWN/FEATHER WRAPPED SEAT CUSHION
As we age, we may develop chronic conditions and weaknesses that can lead to diminished functional capacity. But If we are intentional about our design choices when we’re building our homes, we can add subtle design features that can help us stay comfortably and safely at home as we age. Please remember that the purpose of this podcast is simply to educate and inform. It is not a substitute for professional advice. The information that you hear is based the only on the opinions, research and experiences of my guests and myself. That information might be incomplete and it’s subject to change, so it may not apply to your project. In addition, building codes and requirements vary from region to region, so always consult a professional about specific recommendations for your home. Thanks for stopping by. Don't for get to subscribe so new podcasts and posts will go to your email as soon as they are released.
0 Comments
Your comment will be posted after it is approved.
Leave a Reply. |

 RSS Feed