In addition to the suggestions and tips that I gave you episode 125 called "Consider These 50 Things for Your Electrical and Lighting Plan," I’m giving you 21 bonus tips that I’ve curated from past BYHYU episodes/posts. So that you can easily access the lighting and electrical tips to help you develop your own lighting plan, I’ve put them all together in one and a half episodes. You’ve heard these 21 bonus tips before, but I think this will serve as a nice refresher for many of you. Plus it will save you the trouble of having to listen to or read through several podcast episodes and posts to find the tips that will help you. If you haven’t listened to or read episode 125, you’ll definitely want to do that since the lion’s share of the suggestions are in that episode/post. Let’s get right into our 21 bonus tips. 1. Tell your electrician if you want a standby generator. To learn more about generators take a listen/look at Episode 088. 2. If you plan to add an emergency stand-by generator now or in the future, have the electrician wire your home with 2 breaker boxes— one for essentials, like the refrigerator and kitchen lights, and one for non-essentials. That way you can connect only the essentials to the generator. 3. Have internet wiring installed in most living spaces and bedrooms in your home— Ethernet and coaxial cabling. And make sure there is an Ethernet port by each TV outlet since a lot of new TVs allow you to stream television shows and movies through online outlets like Netflix and Hulu. I know what you are thinking… we want wireless internet. Well, let the iPads and other mobile devices stream wirelessly. But your televisions, desktop computers, video games, and theater rooms should be hardwired whenever possible. That way more wireless bandwidth will be freed up for the wireless devices, and smart TVs and other stationary web-connected devices can use faster and more reliable wired connections 4. If you plan on having a security system and cameras installed in your house, tell your electrician. Have your house wired for a security system & cameras even if you plan on adding the system well after construction. 5. Put a wall switch in each room that is linked to most of the power outlets in that room, that way most electronics can be turned off by that wall switch when you leave the room. This is a great energy saver since electronics that are plugged in use some electricity, even if they’re switched off. You probably don’t want your alarm clock added to that circuit though, otherwise you’ll have to reset your clock everytime you use that switch. 6. Have electrical outlets built into the kitchen island or peninsula so we can plug in slow cookers, blenders, mixers or other appliances. Hide outlets under the countertop overhang or behind a fake drawer front that flips open to expose the outlet for a sleeker look. 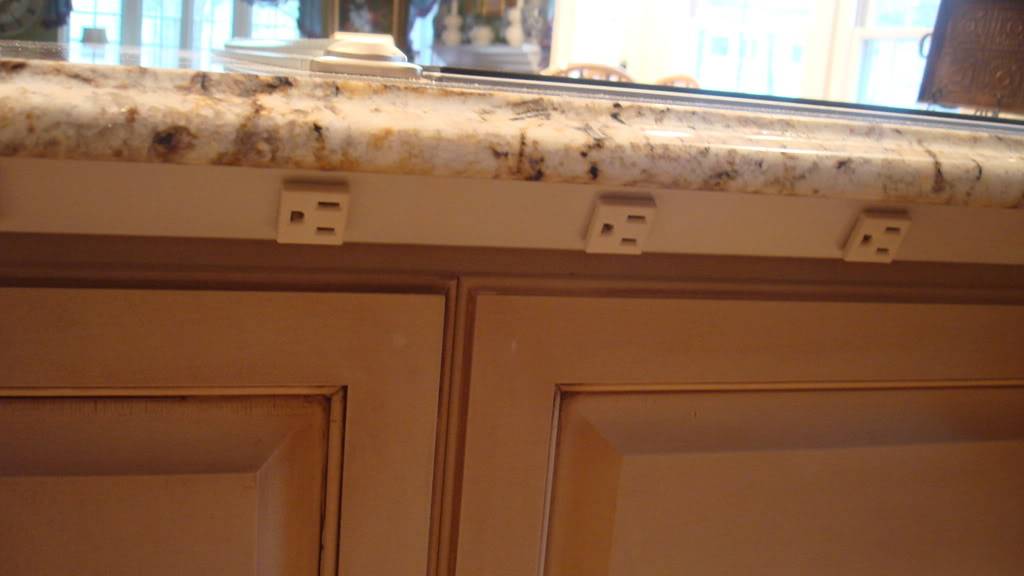

7. Add charging stations to your kitchen, dining room or family room so family members and guests can conveniently recharge their phones. 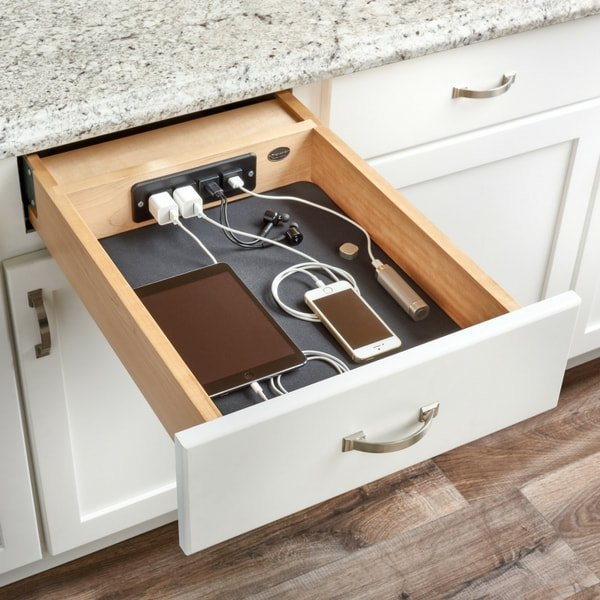
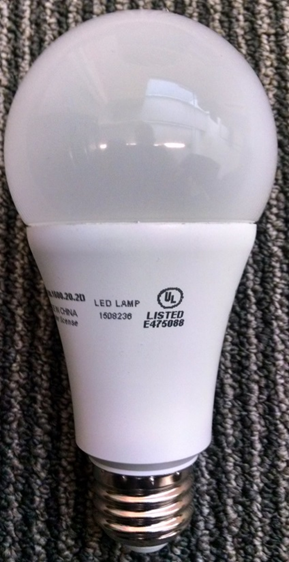
8. Make sure your house address numbers are adequately lit. 9. Put ambient lighting in cabinets & built-ins on timers so they'll come on and off automatically. 10. In narrow rooms, place lighting on the short walls of the room rather than drawing attention to the long narrow walls. This results in a wider looking space. 11. For narrow hallways, choose sconces that project light both up and down the walls and use scones on both sides of that narrow hallway to balance the space. 12. Entry foyers should not be overly lit, otherwise the transition from outdoors to indoors can be disorienting, especially at night. 13. For indoor and outdoor lighting, use a combination of both uplighting and downlighting. Indoors, for example, lots of of down lighting is used, where the light is directed downward. Balance that with uplighting by adding pendants, scones or chandeliers that cast light upward. 14. A chandelier or ceiling fan light should not be your only light source in a room. Add in recessed lighting and or table lamps to help increase ambient lighting and to serve as task lighting. 15. Use IC housing rated recessed lights if the lights are going to be placed in the ceiling near insulation. IC stands for insulation contact. Most recessed lights should be insulated since conditioned air can escape through non-insulated recessed lights. 16. If you’re going to use a recessed can as an accent light, center the recessed lighting fixture 12 to 18 inches in front of the objects you wish to light - a painting, bookshelf, or your face in the bathroom mirror, for example. 17. To ensure that you’re getting a safe fixture or light bulb, look for the UL or ETL mark on the product or packaging. There are many lighting products on the market, however they are not all created equal. The UL or ETL mark ensures the bulbs and fixtures are safe to use and have been tested by an independent laboratory. The UL or ETL listing is not a requirement to sell products in the US, but if your project is going to go through an electrical inspection, products without those labels can be rejected by the inspector. 
18. Choose your focal point first, then fill in around that. If you have of a specific spot in a room where you know you want a recessed task light or chandelier, that should be your starting point for your lighting layout. Then fill in the space around that fixture with recessed lights. When laying out recessed lighting in a kitchen, for example, you might want to be sure there is a light above the stovetop and the sink, then fill in recessed lights around those. 19. If you prefer to simply space the recessed lighting evenly around the room without any particular focal point, place your first light in the center of the room and fill in from there. 20. In the kitchen, avoid going light on lighting. Think about it, the kitchen is where you’ll be working with very sharp objects and very hot surfaces, so you want there to be plenty of light. Too often people think that installing one single overhead light in the center of the kitchen is enough. But, it’s not. Ideally, the kitchen should have 3 types of lightening— general lighting, task lighting and accent lighting. Kitchens typically have an overhead light fixture or recessed lighting for general lighting. Task lighting is where many kitchens fall short. Lighting should be added wherever the main kitchen tasks are performed, including prep areas, the sink and the stove. Recessed lighting can be used not only for general lighting, but for some task lighting, as well. Other examples of task lighting are pendants over your island and strip or rope lightening beneath upper cabinets so that countertops are well lit. Accent lighting adds visual interest and drama, but it’s the layer of lighting that’s not really essential. So, if you have a tighter budget, this is the lighting layer that can be eliminated. Accent lighting can be added inside glass cabinets to highlight special dishes or in the toe kick area of lower cabinets and around the bottom of your kitchen island. Accent lighting is more for beauty than for function. 21. Add oversized or statement lighting fixtures to increase wow factor. You can also add wow by choosing fixtures with unusual shapes and finishes or adding clusters of lights. 22. Here's a bonus, bonus tip. Don't forget to add recessed outlets to the floor in living spaces where you want to place floor lamps, table lamps or other electronics. There you have it. Your bonus lighting and electrical tips. Hope this helps you. Thanks for stopping by.
0 Comments
Your comment will be posted after it is approved.
Leave a Reply. |
 RSS Feed