Uncontrolled moisture, in the forms of liquid water and water vapor, are huge enemies of any home. If not controlled, moisture can cause heating and cooling inefficiencies, resulting in an uncomfortable house and higher utility costs. Uncontrolled moisture can also lead to rot, mold, structural damage, and poor air quality. What specific methods you use to control moisture will depend on the climate in your region and the design and construction of your home. This week we’ll go over some moisture control strategies that will work for the majority of us, but always consult with local contractors to a make sure these strategies will work for your project. The information in this episode comes primarily from the US government’s website Energy.gov and energyvanguard.com Let’s get right into it.
Moisture, in the form of water vapor, moves in and out of our homes in three ways:
1) through air movement 2) through and along with heat 3) through materials Air movement, by far, accounts for the vast majority of water vapor movement within a house. Air naturally moves from areas of high air pressure to areas to lower air pressure. Together air, and its companion moisture, will move through any available hole or crack in the building envelope. Carefully air sealing any holes, cracks or pathways where there is potential unintended air movement through the house is one of most effective ways to control moisture. Your HVAC professionals, framers, plumbers and other contractors should be diligent in sealing any holes or cracks that would let unwanted air flow into, or out of your house. A home energy rater can arrange a blower door test that will identify air leakage from unintended holes so holes and cracks can be properly sealed. 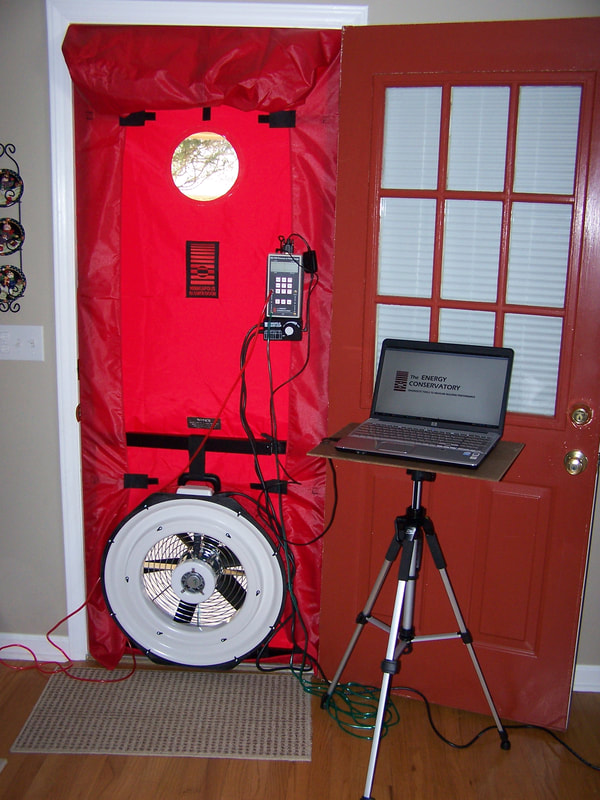
BLOWER DOOR TEST
Other ways of controlling moisture include decreasing the movement of outside and inside moisture through materials and controlling moisture that accompanies heat flow. Most building materials that we use to construct our homes will naturally slow the transfer of heat and moisture to some degree. For example, brick, exterior wall sheathing, insulation, and drywall all obviously play a major role in reducing heat and moisture transfer. But moisture is best controlled by taking extra steps beyond simply erecting those basic construction materials. To manage moisture, we should strive to have better control of our home’s temperature, specifically heat. Warm air holds more moisture than colder air can. So if we can control the amount of heat that moves into and out of our homes, we can better manage moisture. If we don’t control the amount to heat that enters and exits our homes, we may have trouble with moisture in the form of condensation, where water vapor turns to liquid water droplets. Let me briefly explain condensation. The temperature and moisture concentrations at which water vapor begins to condense is called the "dew point." Think of water vapor turning to dew. Once air has reached its dew point, excess moisture in the air condenses on the first cold surface it encounters. We sometimes see condensation on our cold window surfaces. But if the coldest surface is within the home’s exterior wall cavity, the condensation can settle inside the wall. This can result in wet insulation and framing, which can lead to mold and rot. Condensation within the exterior wall cavity can also lead to poorly functioning insulation and, as a result, increased heating and cooling bills and discomfort within the home. 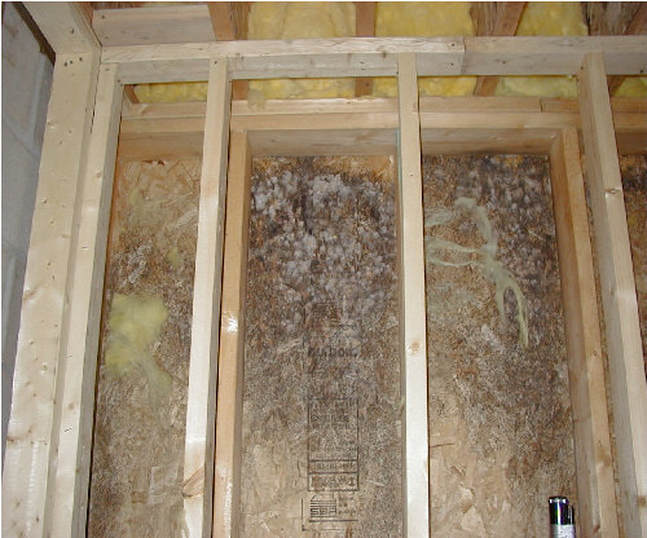
CONDENSATION IN THIS WALL CAVITY LED TO MOLD
To manage moisture, we’ve just learned that we need to 1) reduce air leakage and 2) reduce unwanted heat flow. The last of the 3 major things we need to address to control moisture is controlling the movement water vapor itself through materials. Properly installed vapor diffusion retarders, which used to called vapor barriers, can be used in most of the US to reduce the amount of moisture transfer. A vapor diffusion retarder is a material that reduces the rate at which water vapor can move through building materials. white house wrap and the green Zip System that are commonly seen covering the exterior of new construction homes are examples of vapor diffusion retarders. 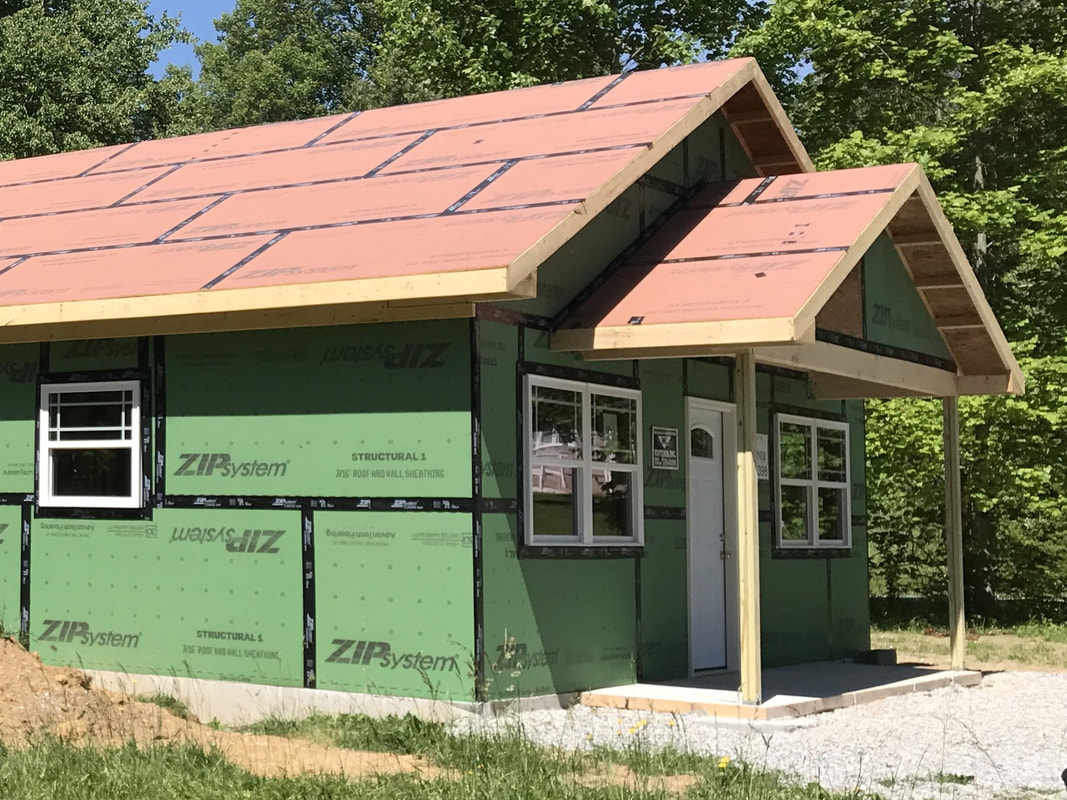
Except for in deliberately ventilated spaces, insulation and vapor diffusion retarders work together to reduce the opportunity for condensation in a house's ceilings, walls, and floors. Specific materials used as vapor diffusion retarders might vary depending on your climate, but no matter where you are, you’ll want a vapor diffusion retarder included on your home. Now let’s talk about a few specific things that many of us can do to control moisture in our foundations and walls Foundation Moisture Control Moisture problems can develop anywhere, but are especially prone to develop where the house is below grade, meaning anywhere the house contacts the ground, whether that’s a basement, crawlspace, or slab foundation. To create an energy-efficient and comfortable living space in your basement, you will need to insulate, as well as properly control moisture. Most basement water leakage and moisture problems result from water flowing through holes and cracks in the basement walls and/or water coming through porous building materials used to construct basement, such as concrete. With new construction, there are a few things that we can do to manage moisture around the foundation. Although specific moisture control methods can vary depending on your climate, the following measures can be taken in most circumstances: 1. Make sure no untreated wood has direct contact with the ground. Untreated wood can absorb water from the ground and transfer that moisture to other building materials. 2. Install a gutter system that’s connected to a drainage system so you can direct rainwater away from the house. To learn more about gutter systems, take a listen to episode 114 called If Your Mind Is In the Gutter, Good for You! 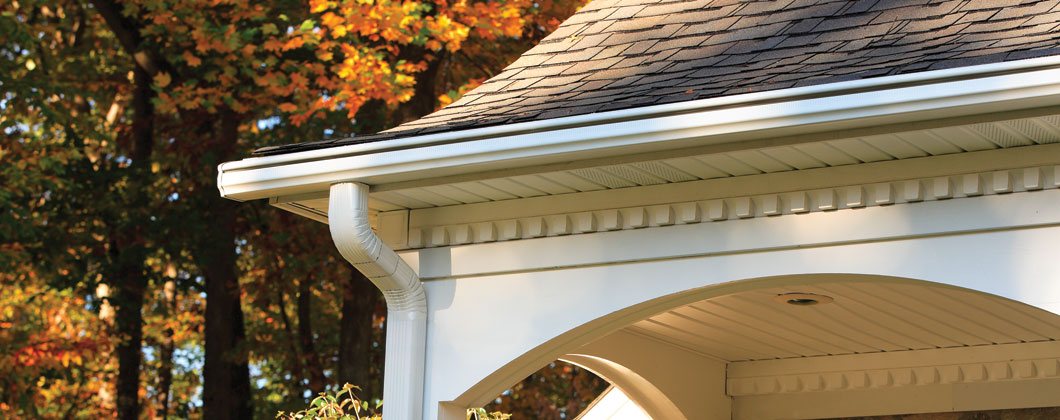
3. Make sure the ground around your house slopes away from all sides of the house for at least 5 feet at a minimum grade of 5 percent. You can talk to your builder or excavator about this. 4. Add a foam gasket under the sill plate. Let me explain: A sill plate, also known as a sole plate, is the bottom horizontal piece of lumber that sits on the foundation. Vertical wall studs attach to the sill plate. That horizontal sill plate is anchored to the concrete foundation. But there should be thin foam material, called a gasket, between the sill plate and the foundation, so the wood sill plate is not in direct connect with the concrete. The foam gasket will help stop moisture from wicking up from the concrete up into the wood sill plate. 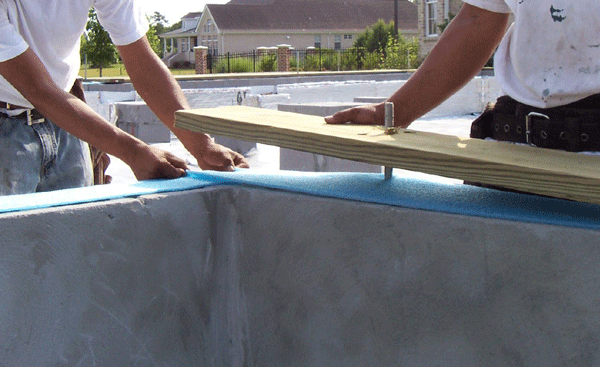
SEE THE BLUE GASKET MATERIAL?
5. To be extra diligent, you can also seal the vertical area where the sill plate and the foundation come together using rubberized materials, such as tape or liquid sealant. This sometimes called sealing the sill. Taking these steps not only controls moisture, but also decreases air leakage and helps to keep insects and other pests outside your home. 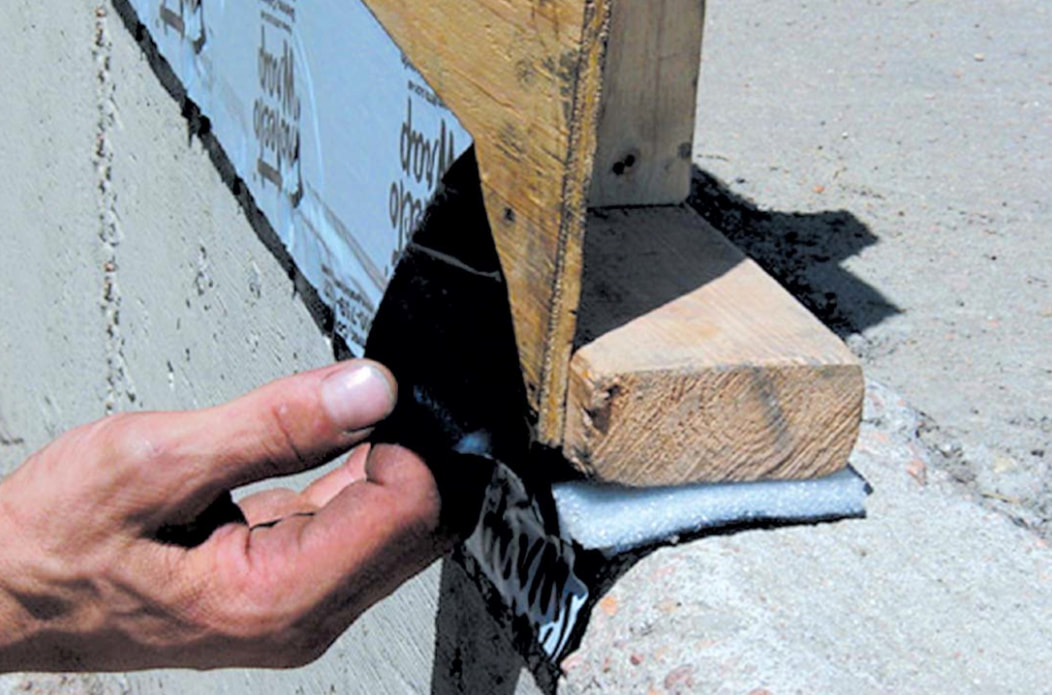
6. Damp-proof or water proof all below-ground portions of the foundation to prevent the wall from absorbing ground moisture. 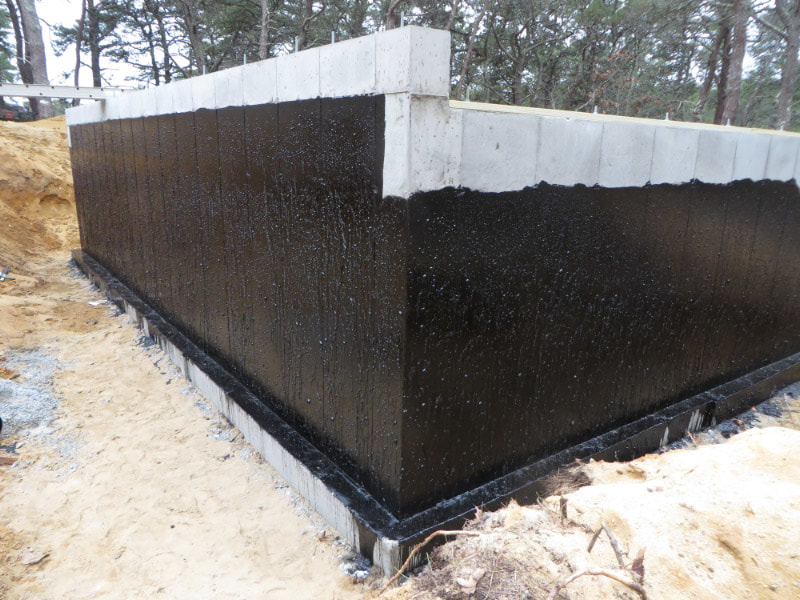
THE BLACK STUFF IS DAMP PROOFING MATERIAL
7. Place a continuous drainage plane, sometimes called a water resistant barrier, over the foundation’s damp-proofing or exterior insulation. The drainage plane will direct water away from the foundation into the foundation drain. 8. Install a foundation drain directly below the drainage plane and beside (not on top of) the footing. 9. Underneath the basement or slab floor, install a layer of polyethylene, or similar material, over at least 4 inches of gravel to reduce moisture transfer from the ground. Contractors in your area may use a slightly different method, but the point is the stop ground moisture from wicking up into the foundation. 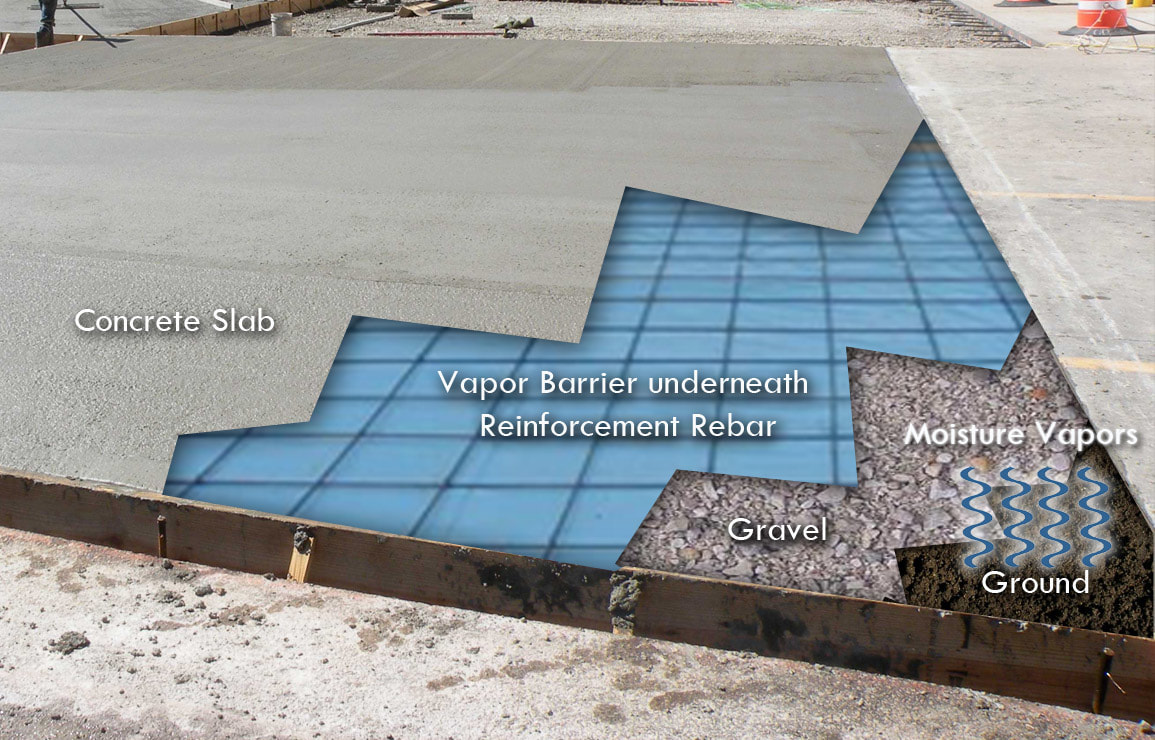
10. If you have a crawlspace, you can install a polyethylene vapor diffusion retarder, which looks like a thin layer of plastic, across the crawlspace floor to prevent soil moisture from moving into the crawlspace. Overlap all seams by 12 inches and tape them. Then extend and seal the polyethylene 6 inches up the crawlspace walls. 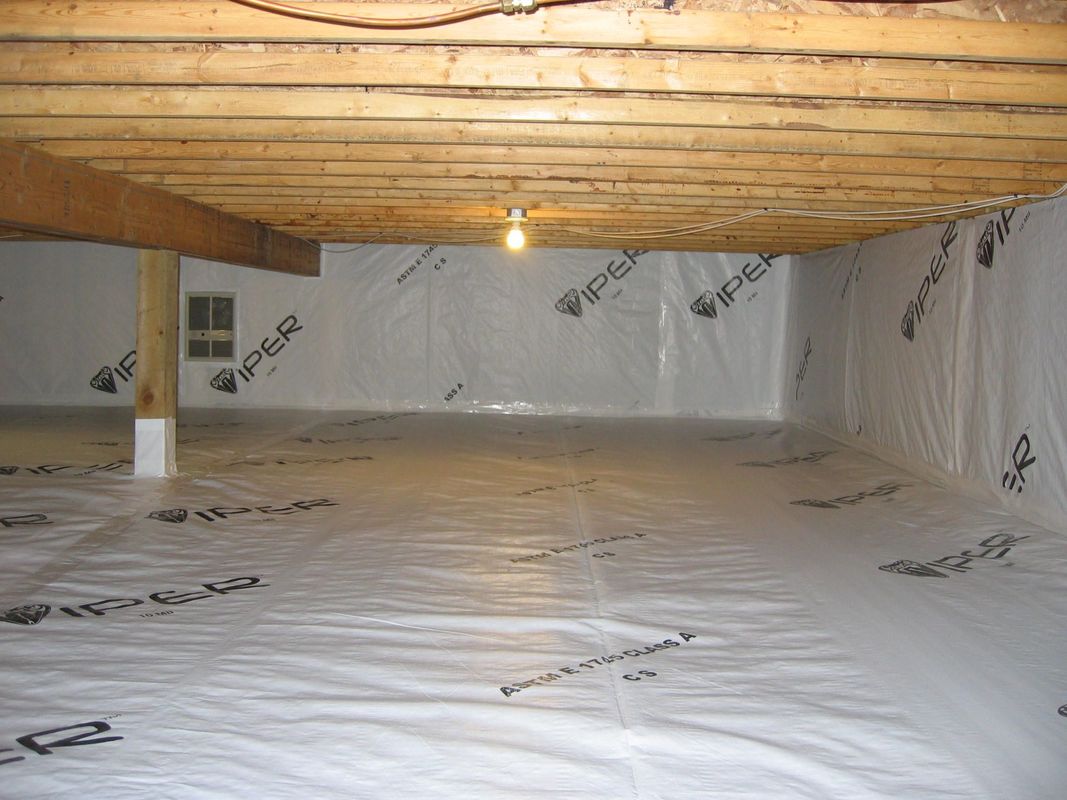
CRAWLSPACE WITH VAPOR DIFFUSION RETARDER
Finally, let’s go over 3 strategies for controlling moisture in your home’s walls Moisture Control For Walls 1. Install a vapor barrier, aka vapor diffusion retardant, such as house wrap or the Zip system. 2. Ask for a rain screen to be installed behind your exterior cladding. Simply put, a rain screen is just an air gap behind your exterior cladding or siding, whether that’s vinyl siding, stucco, brick, or stone. The rain screen also includes air gaps at the top and at the bottom of the exterior walls. This allows the siding to stand away from the vapor diffusion retardant that covers the house. The rain screen allows drainage and evaporation of any moisture that gets behind the siding. 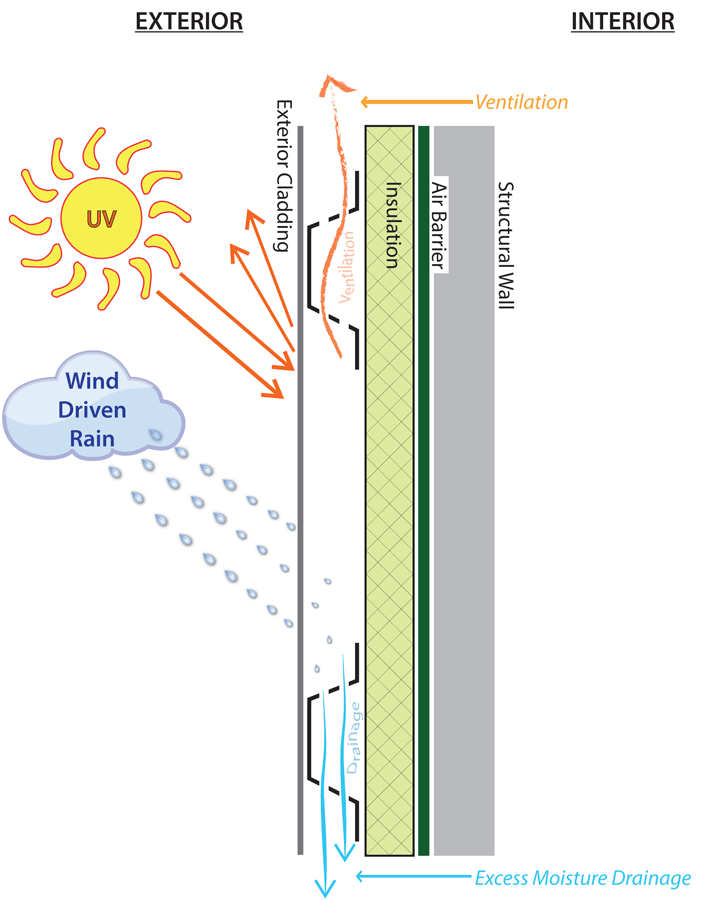
THE RAINSCREEN IS THE WHITE AREA BETWEEN THE EXTERIOR CLADDING AND THE INSULATION
3. Add caulking, sealants, weatherstripping or flashing, which is a thin layer of waterproof material, around all unwanted exterior wall openings such as around windows, doors, and areas where there are exterior plumbing and electrical boxes. 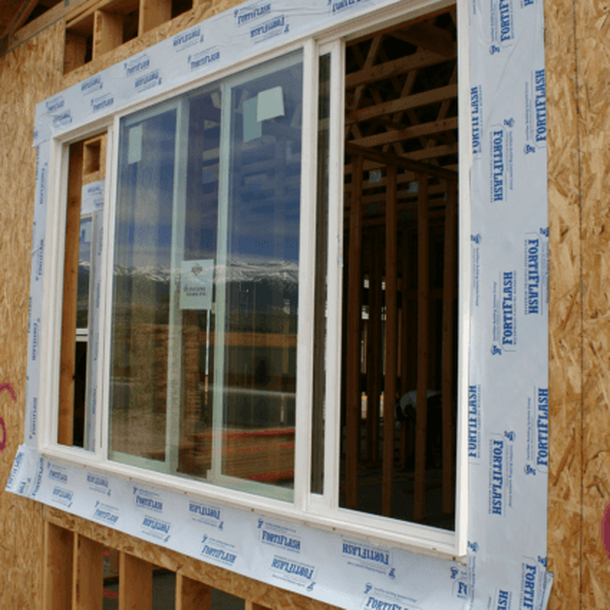
THE WHITE AND BLUE TAPE- LIKE MATERIAL IS FLASHING
Now, what about controlling moisture on the roof? Energy.gov doesn't give specific suggestions about how to control moisture on the roof. I think that’s because strategies for controlling moisture and condensation on the roof are so dependent on your climate, the design and slope of your roof, and the type of roofing material your house will have. It’s best to consult your builder, a home energy rater or local roofer about the specifics of roof moisture control for your house’s roof design. If you’re planning a tight building envelope with minimal air leakage, which you should be, you’ll want to have ventilation system installed which will bring fresh air in and take stale air out. And proper ventilation is also a part of an effective moisture control strategy. We’ll talk more about ventilation systems in next week’s episode. Let’s end with a couple of quiz questions, but before we do, let me remind you that If you find this podcast/post helpful, you can subscribe so new episodes are automatically downloaded to your device (if you subscribe in Apple Podcasts) or go start to your email (subscribe above). This is especially important if you’re new the podcast and blog and might have trouble remembering our name and release day. Alright, ready for your quiz? QUIZ 1. To manage moisture in our homes, should we: A. Control air leakage B. Control unwanted heat flow C. Control movement of water vapor through materials D. All of the above The answer is D, all of the above. 2. Which of the following specific strategies can we use to help control moisture in our homes? A. Seal all unwanted holes, cracks and pathways with caulking, flashing, sealants or weather stripping B. Add a foam gasket between the sill plate and the foundation C. Add a properly installed gutter system D. Add a rain screen behind exterior cladding E. All of the above The answer is E, all of the above. Please remember that the purpose of this podcast is simply to educate and inform. It is not a substitute for professional advice. The information that you hear is based the only on the opinions, research and experiences of my guests and myself. That information might be incomplete and it’s subject to change, so it may not apply to your project. In addition, building codes and requirements vary from region to region, so always consult a professional about specific recommendations for your home. Thanks for stopping by. I hope you learned as much as I did and I hope you come back next week for another edition of Build Your House Yourself University-- BYHYU.
0 Comments
Your comment will be posted after it is approved.
Leave a Reply. |
 RSS Feed