Do y’all remember that episode of Seinfeld where the girl Jerry was dating looked either really pretty or really unattractive depending on the lighting she was in? That bad lighting is what we want to avoid, especially in our homes. Although I don’t consider myself to be overly concerned with looks, I’d rather avoid the spooky, ghoulish shadows on faces that can show up because of poorly designed lighting. It used to be that only models, actresses, photographers and entertainers were aware of what type of lighting is most flattering. But in this new era of selfies, social media posts, and You Tube channels, lighting our homes in a way that flatters us and our surroundings has become top of mind for even the average Jo(e). I’ve done a basic lesson on the terminology and logistics of lighting, in episode 103 called Lighting 101, but I thought it would be helpful to come up with a list of tips that would we can incorporate into homes to not only make the lighting design functional, but also flattering. If we can do relatively simple things in our homes to make us look and feel our best, why not? I mean, we need to include lighting in our houses anyway, so why not use and place fixtures so that they shine the very best light on ourselves and our guests? I’ve composed a list of of 8 tricks and tips from lighting designers and photographers that we can adapt to our homes for the most flattering lighting. 1. Avoid fluorescent bulbs. That includes CFLs, “compact fluorescent lamps.” Fluorescent light bulbs cast a cloudy greenish haze that’s unflattering. Green light, by the way, is one of the most unnatural, unflattering light colors there is, so never light an event or party with green lights. Instead of fluorescent bulbs, we should choose LED bulbs because they cast a cleaner, more flattering light. And LEDs are much more energy efficient and long lasting. Although CFLs are more energy efficient than old fashioned incandescent bulbs, they are not nearly as efficient as LED lights. 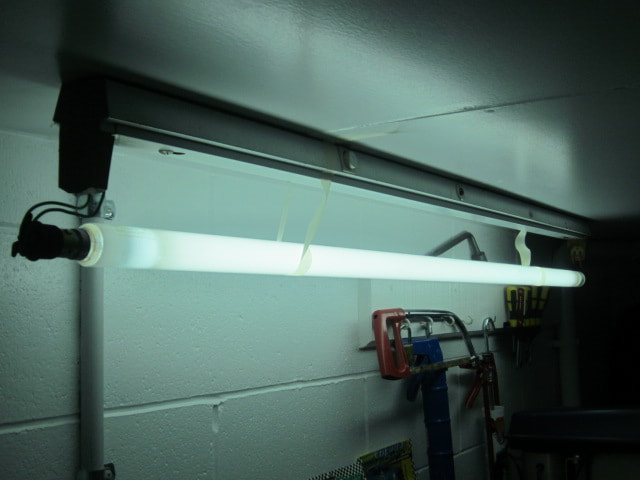
FLUORESCENT BULB (DON'T DO IT!)
2. Choose bulbs and fixtures with a CRI (Color Rendering Index) of 90-100. CRI stands for Color Rendering Index. The color rendering index is a measurement of how well the light displays color. The closer to 100, the better, more natural, and truer colors look under the light. Light sources with a CRI of 80 to 90 are regarded as “good” and those with a CRI of greater than 90 are excellent! For the most flattering light that shows colors in the most natural and vivid way, choose bulbs or fixtures with a CRI of 90 to 100. The closer to 100 the CRI of your light is, the more likely you and your surroundings will look clear, bright and have the coloration you’d see if you were outdoors in natural daylight. In other words, closer the CRI is to 100 the better. 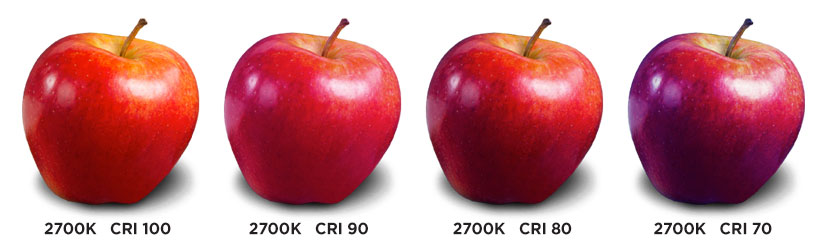
3. Stick with lights that are 2700-3500 Kelvins. To get the most flattering lighting in your home, using the proper Kelvins goes hand in hand with the using the proper Color Rendering Index. Okay, Pop quiz. Can you remember what Kelvins are? We talked about Kelvins in the Lighting 101 mini lesson in episode 103. Well, Kelvins are the measure of color temperature for light. It’s a way to describe the color appearance provided by an LED light bulb/light fixture, whether that’s a warm, yellowish light, or a cool, bluish light, or a neutral, white light. The lower the Kelvin number, the warmer the light will be and the higher the Kelvin number, the cooler and bluer the light will appear. Most all lighting designers and interior designers agree that the most flattering light comes from lighting sources with a color temperature of 2700 Kelvins. That’s a warm, soft yellow light. But since sometimes we want a more neutral, brighter, whiter light in certain areas like a closet, kitchen or a bathroom, they say you can go up to 3500 Kelvins and the light will still be pretty flattering. Although you might want to go above 3500 Kelvins so you can visualize certain tasks more clearly, just know that that harsher, brighter light will likely cast a less attractive, bluish hue and have more glare. Be careful of choosing bulbs based only on names like soft white, warm white, or cool white because those names are not consistent from brand to brand. Always look at the Kelvins to ensure you’re choosing the color temperature you prefer. 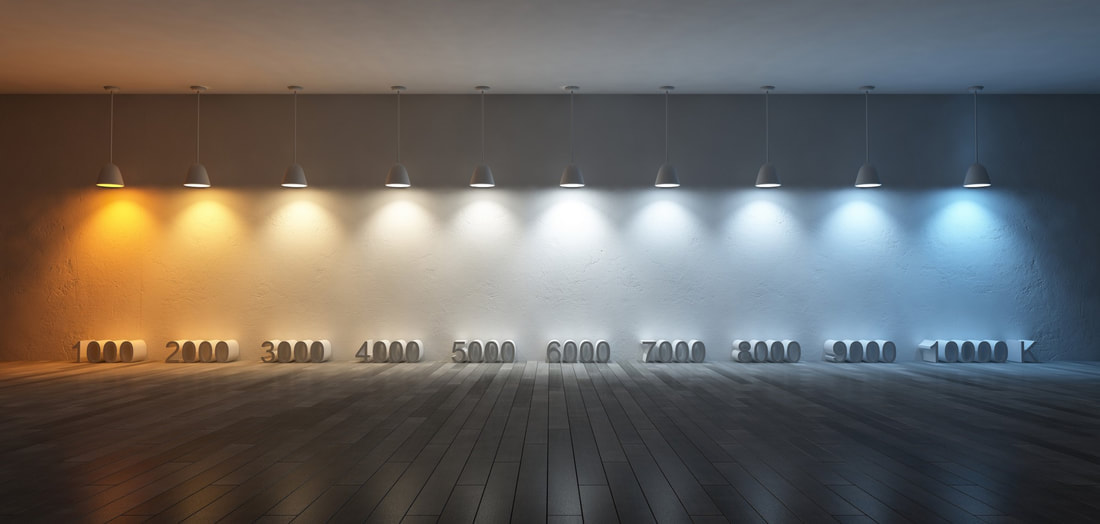
KELVIN TEMPERATURE COMPARISON
Most of us who like a bright, neutral white light will probably be just fine with a bulb or fixture with 3500 Kelvins, if it also has a Color Rendering Index close to 100. The key to a bright neutral white light that’s both flattering and functional is to not go too high on the Kelvins, sticking to around 3500. But we also need to combine that with a very high CRI, as close to 100 as possible. That’s gives us light that is bright and white without being too harsh and glaring. You might want to buy a few bulbs with different temperatures to experiment with what looks best to you. You can also look for fixtures with a dimmer that not only decreases the brightness or lumens of the light as it dims, but that also decreases the Kelvin temperature to a warmer, more flattering light as it dims. That way you get the best of all worlds. 4. Light the your walls. Using recessed ceiling lights and lighting sources behind plants and furniture, and along architectural structures like molding, have your lights reflect onto walls so that light bounces off your walls. The light that bounces off of walls gives a flattering, indirect glow to faces and objects without any glare. That’s assuming your wall color is not an unflattering color like a bright green. The light also transforms your walls into canvases that act as beautiful backdrops. Place recessed ceiling lights about 2- 3 feet from the walls so the light is far enough away from the wall to spread and adequately illuminate the wall surface. You can also light walls with floor lamps and scones. 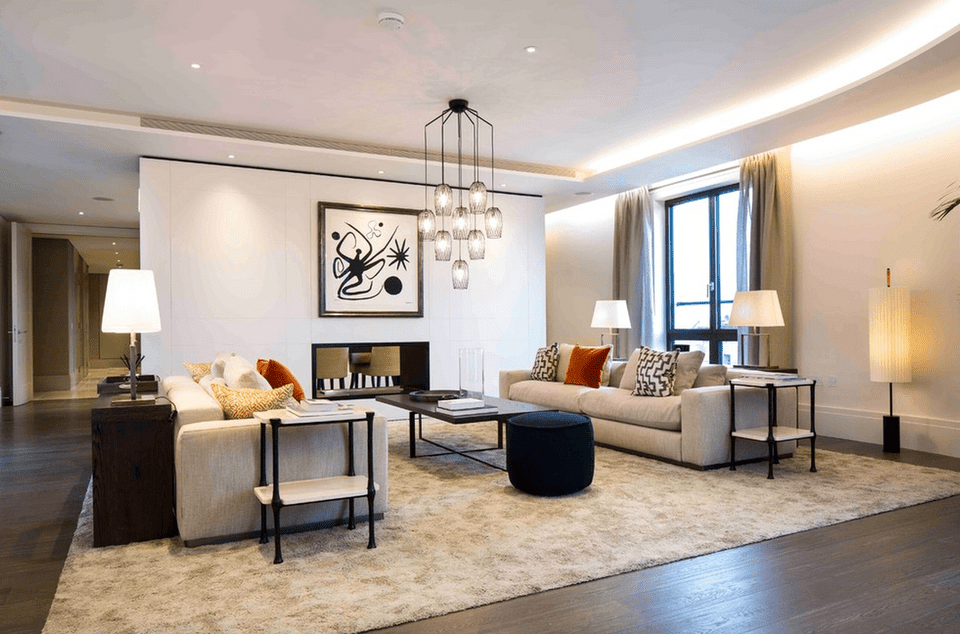
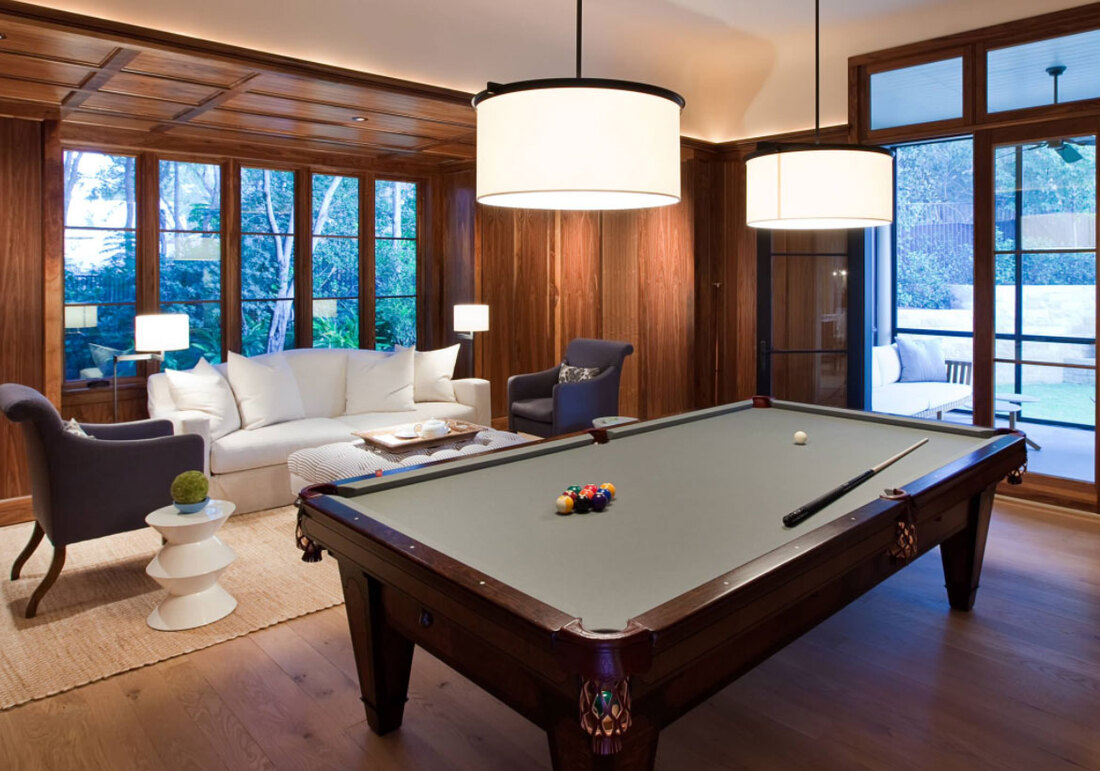
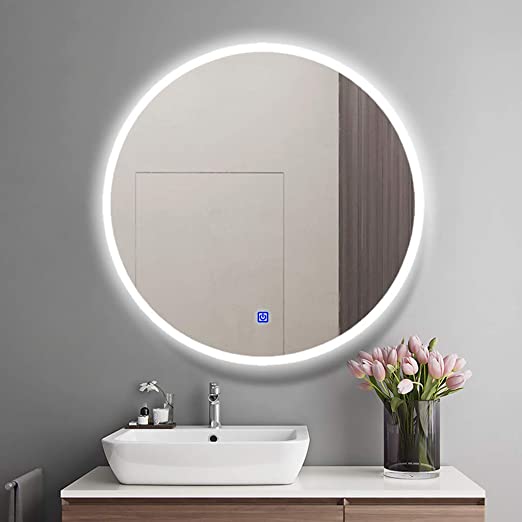
5. Avoid placing ceiling lights directly over your heads. Some designers say to completely eliminate all overhead lighting because it can cast such unflattering shadows. But that’s not a realistic request for the functionality of most homes. It’s usually pretty difficult to avoid all overhead lights because overhead is where a lot of ambient lighting comes from. Remember ambient light is all-purpose, general lighting. Think of the “a” in ambient, and the “a” in all-purpose to remember that term. But to make overhead lighting more flattering, you can put ceiling lights in areas that will give prettier, indirect light as opposed to unattractive direct overhead light. If we can have ceiling lights placed in areas outside where our heads will be when we are standing and sitting in the house, we can more easily avoid unflattering overhead light. Ceiling fixtures and recessed can lights should be located either behind, beside or in front of places where you typically sit or stand in the home. For example, I told you in the lighting 101 episode NOT put a light directly over where you stand in front of the bathroom vanity. Overhead downlight produces large unattractive shadows on your face. The best place to locate your bathroom vanity lights is on both sides of the mirror, at about eye level. That way both sides of your face are lit without shadows. Long narrow lighting fixtures will work well for family members of various heights. Lights with frosted glass or shades will further soften the light, making it even more flattering. Just make sure you don’t soften the light so much that you have trouble applying your makeup or shaving. For even better lighting, you can also add a can light or fixture above, and just in front of the mirror itself. But you don’t want any light directly over where you will stand. With lights on the sides and above your mirror, your face will be lit from 3 sides and no shadows will form. Lighting that encircles the entire bathroom mirror is also very flattering. 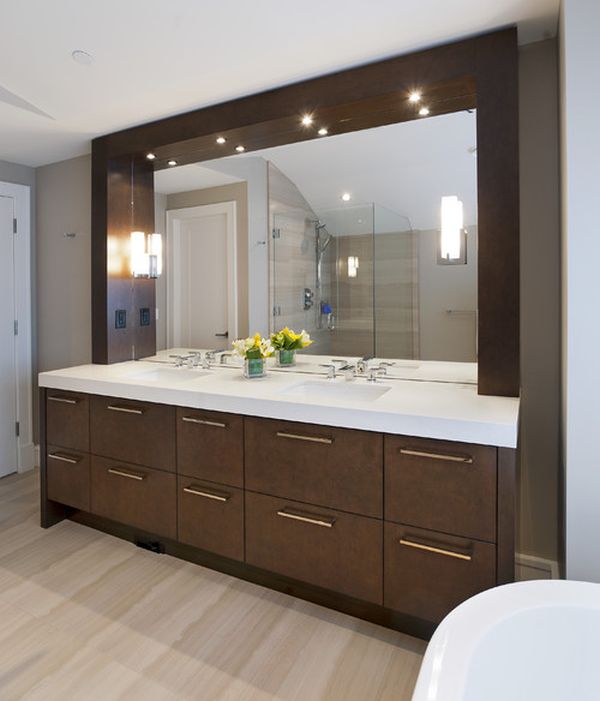
Those ugly overhead downlight shadows don’t just happen in the bathroom, so for the most flattering light throughout the house, we should try to avoid overhead lights directly above where we sit or stand. Walking under ceiling lights is unavoidable, but try not to put ceiling lights directly over the middle of sofas, chairs, stools and where you’ll sit or stand at counters, or tables. Put ceiling task lights over work stations or surfaces, not over the heads of people using those work stations or surfaces. Meaning, put lights over the kitchen island itself, not above the island stools. Place lights above countertops and the cooktop, above tables, and over shelves and above cabinets fronts, maybe recessed under the lip of your countertops or cabinet molding. Think through where people would stand or sit in different areas of your home and avoid lights shining directly down on people’s heads. I was originally planning to place 2 recessed lights directly over the head of our bed. But that plan has changed since I’d rather not have my husband look over at me with ugly, dark shadows on my face. He’d love me anyway, but since I’ll sometimes be in bed with messy hair and no makeup, I’d rather spare him the ugly shadows that enhance my flaws. So instead of using recessed lights over the head of the bed as our reading lights, we’re going to have pendants, wall sconces or lamps beside the bed. That will give us light that is both functional and flattering. We will also have ceiling lights in our bedroom and throughout the house, but they won’t be directly over our heads in most cases. If you’re going to have recessed ceiling lights 2-3 feet from your walls to illuminate your walls, make sure the majority of the seating clears those lights and that the light is not shining down on the heads of you and your guests when you’re seated. This can be achieved by shifting your furniture away from ceiling lights if possible, or placing ceiling lights above walkways and aisles, or directing the lights towards the wall instead of directly downward. 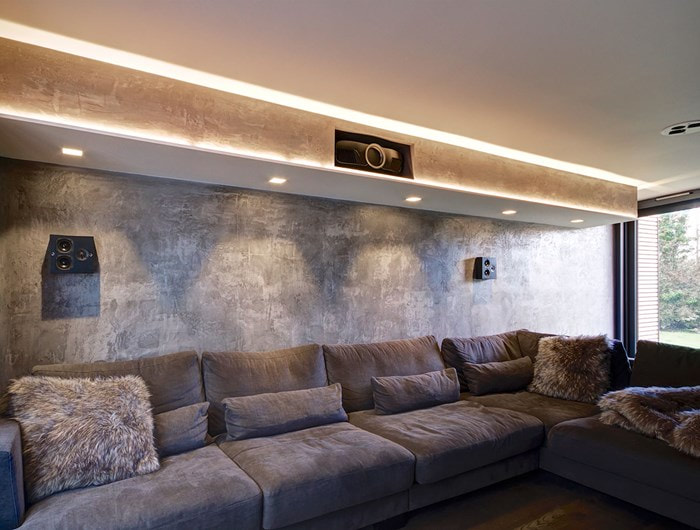
HERE LIGHTS WILL SHINE DIRECTLY DOWN ON THE HEADS OF THOSE SITTING ON THE SOFA (NOT FLATTERING)
6. Choose more horizontal light rather than vertical light. Horizontal light spreads horizontally, across a room or surface. Vertical light goes up and down. Vertical light is useful for some tasks, but horizontal lighting can also be used for general, ambient lighting and for certain tasks. And horizontal lighting is more flattering since it illuminates the sides of our faces, producing fewer unattractive shadows and less glare. Light from a sunset, a candle and a fire are all examples of horizontal light and you know how flattering that light is. Horizontal light can come from several types of lighting fixtures, depending on the direction the fixture casts its light. But horizontal light is most often seen with wall sconces, lamps, and wall washers. Wall washers are usually recessed fixtures and they are designed so light bounces off baffle or reflector surfaces inside the light’s housing. Those wall washers direct the light out more horizontally than vertically. Wall washers are recessed lights with a wider beam spread. 
WALL WASHERS ON THE RIGHT
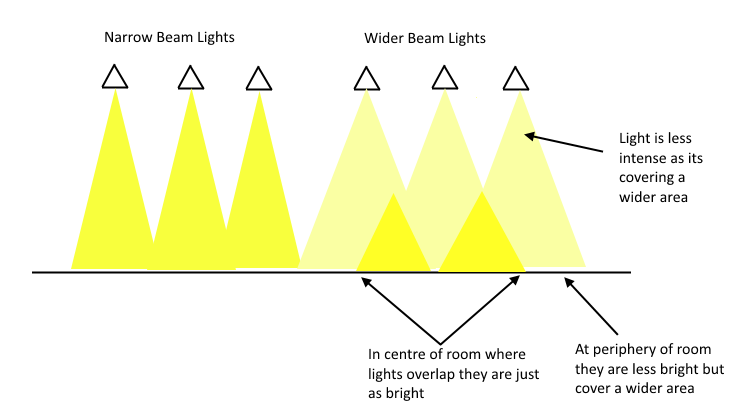
A bulb with a wider beam angle of 60 degrees or more will cast a softer, more flattering light. A beam angle, also called beam spread, indicates the angle or spread of light that extends across a room or surface when a ceiling light fixture is turned on. Most LED lights are available in variety of beam angles. The more focused you want the light, the more narrow you want the beam angle. The softer and more flattering you want the light, the wider beam angle you should choose. Limit your narrow beam spread bulbs to very tall ceilings or where concentrated task lighting or accent lighting are needed. Otherwise, stick to recessed lights with a beam spread of 60 degrees or greater. In summary, it’s good to light vertical surfaces like walls, but use more horizontal, diffuse, spreading light to do so. 7. Used frosted bulbs and fixtures and lamp shades. Exposed, clear light bulbs without a frosted surface produce more direct, less flattering light with glares. Frosted bulbs, and lamp shades help to diffuse and soften light which makes people and objects look prettier. Soft pink light bulbs can also be used in specific places like a sidetable to make almost all skin tones look healthy and glowy. But steer clear of pink light bulbs in kitchens and bathrooms where more neutral white light is needed to help you see colors and details more accurately. 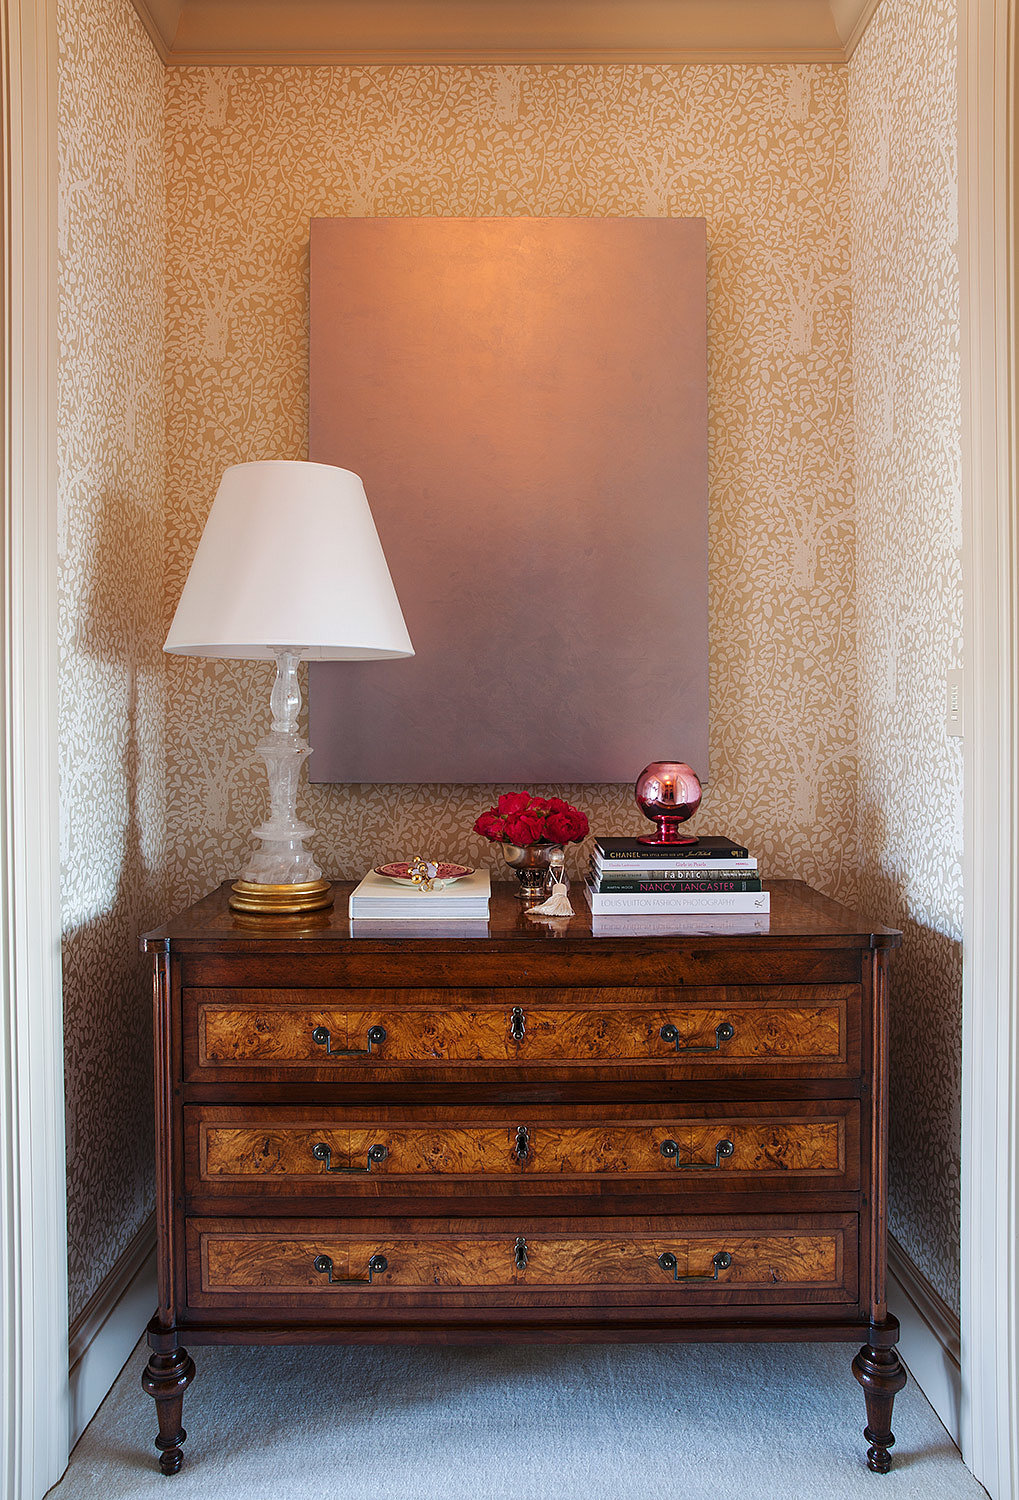
THE SOFT PINK LIGHT FROM ABOVE AND THE LAMP SHADE PRODUCE FLATTERING LIGHT
8. Apply the rule of thirds. We talked about the the rule of thirds in episode 190 called Lighting for Tall Ceilings. That rule has you split the room into 3 equal, balanced parts - the top, the middle, and the bottom. Furniture is in the bottom third of the room. Artwork and other wall hangings are in the middle, and the top third is often used for lighting. But lighting shouldn’t only go in the upper third of a room. Putting lights in each third of a room makes a space feel brighter, and allows for many sources of indirect, flattering light. To light the bottom third of a room, add table lamps, strip lighting for cabinets and floor lamps that cast light downward. Taller floor lamps, wall sconces, lights in built-ins and low-hanging pendants can light the middle of a room. The top third can have recessed cans, strip lighting above molding, flush mount fixtures, and high chandeliers and/or pendants. Track lighting and wall scones, depending on the direction of the light, can be used to illuminate the top, middle or bottom thirds of a room. Now, although we want all levels a a room to be lit, there should be low levels of light in some areas and brighter areas of light in other areas. You want some variation. When you’re at home, you don’t want to feel like you’re in a brightly lit conference room where everything is at the same light level and there is no lighting contrast. 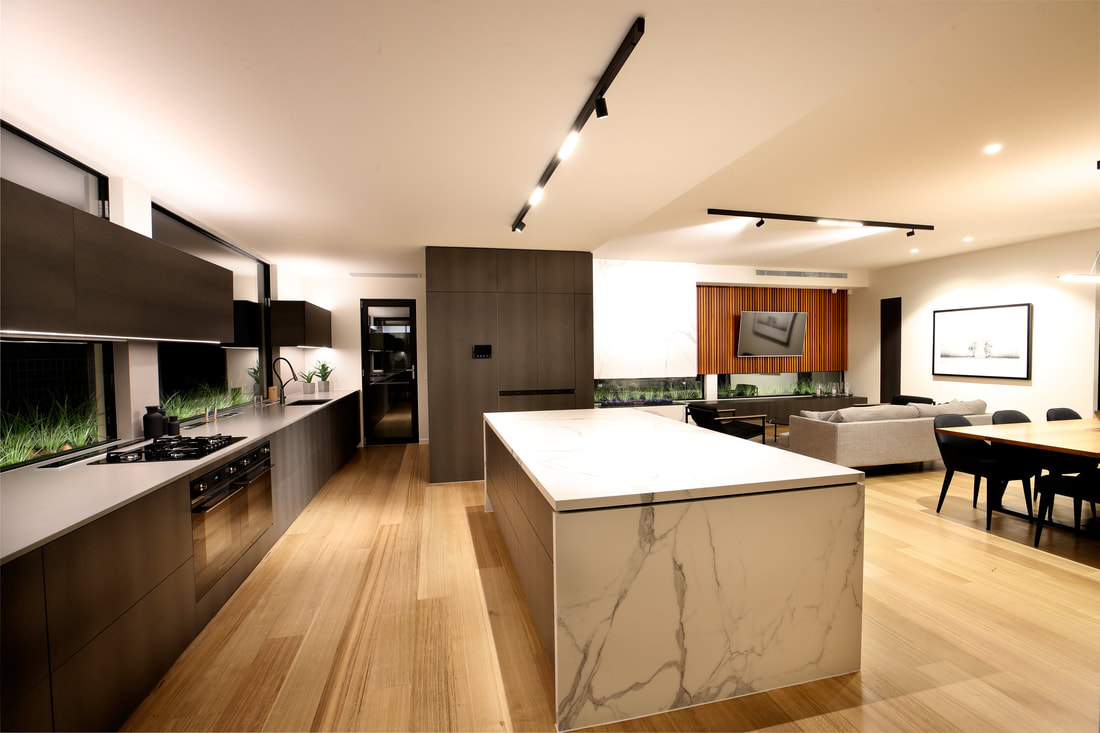
LIGHTING VARIATION
That's it for now. If you want to support the show, subscribe to it so new episodes will go directly to your email or podcast library as soon as they are available. Or you can help us by telling your friends and family about the show, or by sharing an episode through email, social media or text. Well, that’s all I have for this week. I hope you learned as much as I did. Please remember that the purpose of this podcast is simply to educate and inform. It is not a substitute for professional advice. The information that you hear is based the only on the opinions, research and experiences of my guests and myself. That information might be incomplete and it’s subject to change, so it may not apply to your project. In addition, building codes and requirements vary from region to region, so always consult a professional about specific recommendations for your home.
0 Comments
Your comment will be posted after it is approved.
Leave a Reply. |
 RSS Feed